
Doing portrait photoshoots as a new photographer is tough. You have to work one-on-one with subjects to capture their persona, manage your equipment, and appear confident and in charge (even if you don’t feel that way). So, to ease your pain, we made a portrait photography basics cheat sheet with 5 practical tips.
1. Shoot In Manual
We shouldn’t have to say this. Yet, we do find ourselves having this conversation relatively often: do not shoot in automatic mode.
We understand why a new photographer would want to switch their camera into automatic and focus exclusively on positioning their model. However, it’s impossible to get the shots you want and need if the camera runs the shoot.
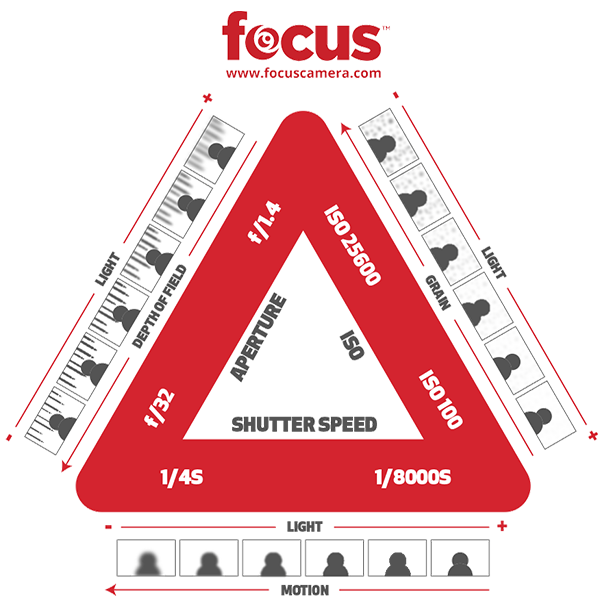
A lot of key elements come together to make a well-composed portrait including aperture, shutter speed, and ISO. If you’re not 100% sure what all of this means and want a better understanding of the basics, we recommend you check out our post on the exposure triangle.
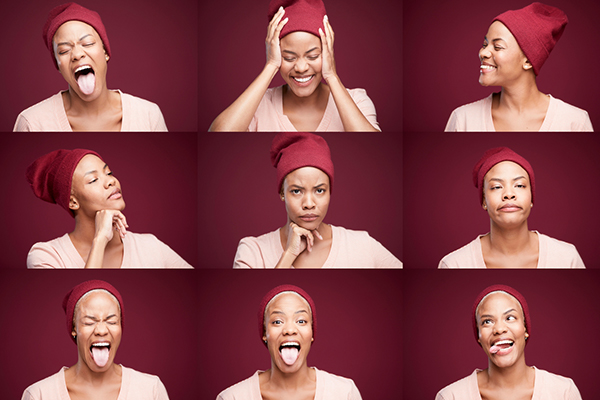
2. Experiment With Moods & Expressions
Repeating “ok now give me a big smile!” for an hour will not only give you limited results but also annoy your subject. Come prepared with prompts that provide opportunities for varied moods and expressions—happy, laughing, serious, thoughtful, loving, peaceful, etc.
Keep in mind that everyone’s preferences are different. Perhaps they’re not crazy about their smile and prefer a more serious shot. Unless you already know your subject well, you won’t know those personal details until you’re mid-shoot.
Also, be sure to keep photographing as the person transitions through different emotions. Often, a genuine moment comes mid-direction or when a person laughs at themselves for unintentionally making a silly face.
3. Know The “Classic” Portrait Formula
There is an easy formula to follow if you want to take a “classic” portrait: simply keep your subject at an angle.
Start by positioning their feet diagonal to where you plan to take the shot—the rest of their body will follow. Your subject will naturally turn their face to you while their chest stays at an angle. Voilà! That’s it.
This form of portraiture has gone to the wayside in favor of more active poses (see #4). However, it’s still a good skill to have in your arsenal for headshots and school portraits.


4. Get Your Model Moving
The background of your portraits doesn’t have to an aesthetically pleasing blur. You can also incorporate your environment as long as it doesn’t take away from the person paying you to take their photo.
If possible, let your model sit, lean, climb, jump, and get inspiration from the surroundings. This rule applies to you, the photographer, as well. Move around the space and take photos at various distances and angles. The worst-case scenario is that they’ll never see those experimental shots. Best-case, you capture something really special.
5. Choose The Right Lens
The last tip on our list is arguably the most important. Make sure you own a lens that will facilitate the intended look and feel of the portraits. Commonly used portrait lenses are often in the 50mm-200mm range with a wide aperture. A couple of good examples are the Sony FE 50mm f/1.2 GM Full-Frame Lens, the Canon RF 50mm f/1.2L USM Lens, or the Sigma 85mm f/1.4 DG DN Art Lens for Sony E.
We hope you found this portrait photography basics roundup helpful! If you have any other practical tips that you want to share, please feel free to leave them in the comments below.


