
Repoussoir is a framing and composition technique used in art and photography. Pronounced “ruh-poo-swahr”, the term originates from the French verb repousser, meaning “to push back”.
As its etymology suggests, repoussoir framing creates depth, with the ultimate purpose of drawing focus to the subject. There are several different ways you can apply this technique to your photography, which we’ve delved into below. But first, let’s take a look at the history of the technique and break down exactly how it works.
Repoussoir in Art
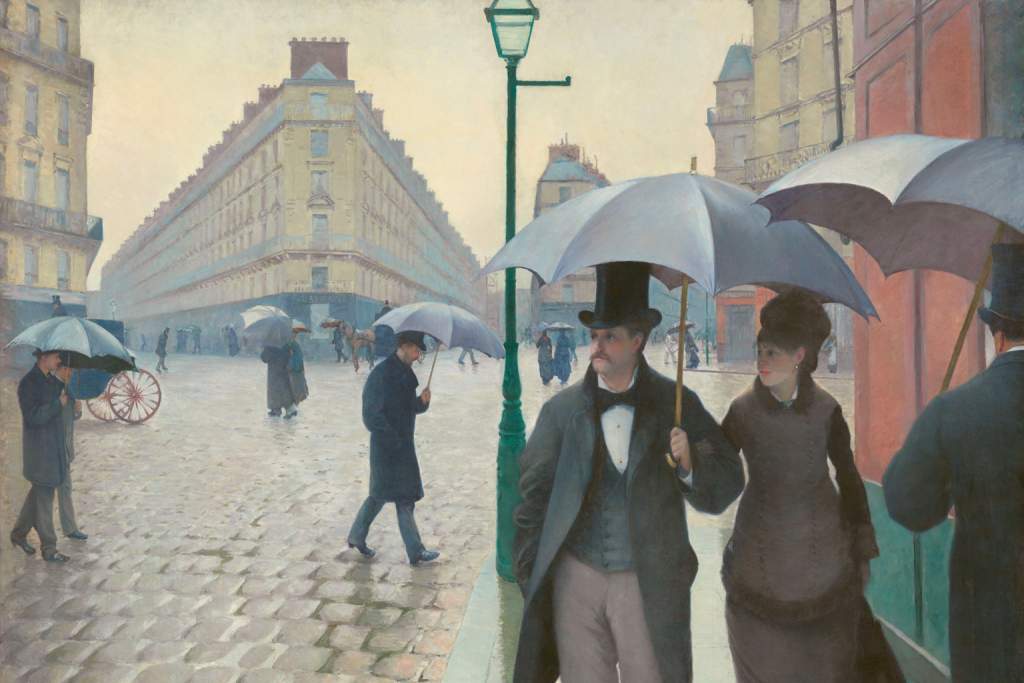
Before photography was even invented, artists were using repoussoir to draw the viewer’s eye into the frame of their paintings. While it’s unknown who first used the technique, the 16th Century Italian artist, Caravaggio, is considered a repoussoir master.
Caravaggio’s works were a source of inspiration for many dutch artists in the 17th Century, aka the Dutch Golden Age. As a result, repoussoir can also be seen in many of the pieces produced during this time. However, it’s generally considered a timeless technique given it has been used independently by artists from different periods across various styles and forms.
How Repoussoir Works
Repoussoir is a time-tested method for using the foreground to strategically frame other parts of the scene. Simply explained, it involves placing objects such as people, buildings or foliage in the foreground of your frame on either side. Bracketing your subject with objects, or even harsh light or shadows, helps draw the viewer’s eye to the focal point of your image.
Repoussoir in Photography
The technique is more easily applied in art, where you can choose what objects or elements to include. The only limit is your imagination (and your painting skills). In photography, it can be much harder to control the visual elements that make up your creation. We’ve listed three ways you can use repoussoir in photography below.
Use people or animals to create movement
Just like leading lines, the eyes or directional positioning of people or animals in a scene will entice the viewer to look at a certain region of the photograph. When we see other people (or furry friends) focusing their attention on something, we naturally want to find out what it is. We essentially become an onlooker, part of the scene in the photograph.
Try it out for yourself. Assemble a group of people, and position those who aren’t the subject on the sides of your frame. Direct them to look at your intended subject, and take the picture. Now, take another photograph without them looking at the subject. Which is better?
If you’re working with animals, it may be harder to draw their gaze, but you only need a split second (and a fast shutter speed).
Place the viewer in the scene

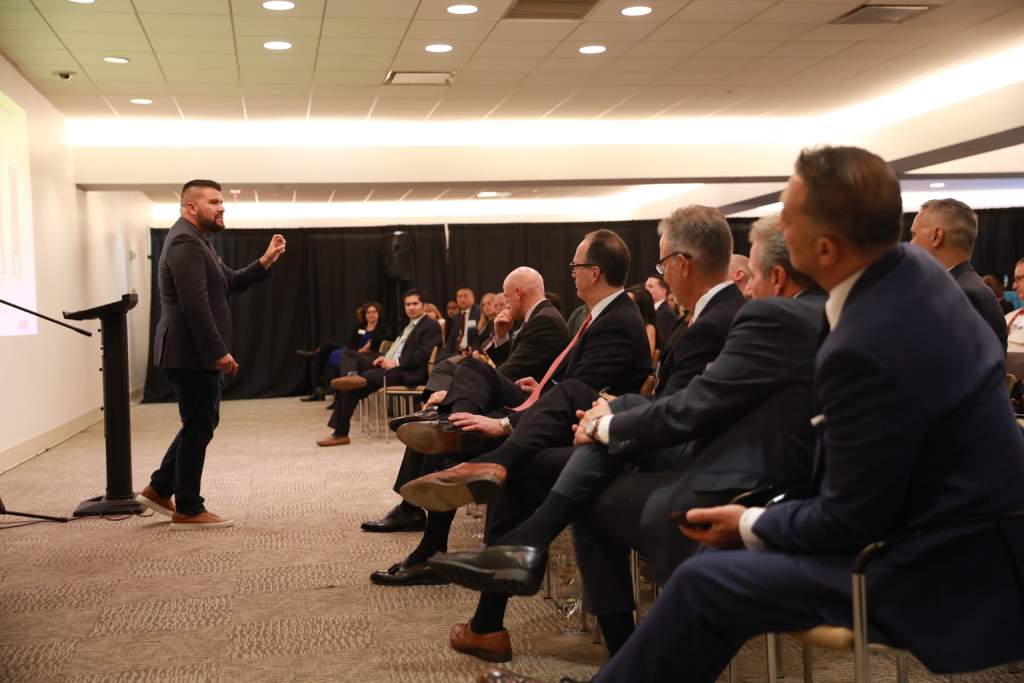
Similar to the previous method, one way to create repoussoir is to involve the audience in the action. Making the viewer feel as if they are part of the scene captured in the image obviously makes for a more compelling viewing experience. The easiest way to do this is to photograph over the shoulder of a person or group of people that is looking at the intended subject.
For example, imagine you are hired to photograph a speaking event. You could use a telephoto lens and simply capture close ups of the presenter. However, using a wider lens and including audience members in the foreground, you can capture a photograph that will make the viewer feel like they are also sitting in the room, watching the presentation.
Bracket your subject using objects or light

If you’re not working with a crowd or multiple subjects, you can also bracket your subject using physical structures, objects, or even light. For example, a common way to achieve repoussoir is to darken parts of the foreground to bring more attention to the subject in a different region. This will be easier in a studio setting, where you have full control over the lighting.
Alternatively, you can position yourself or your subject so they are surrounded by other objects, or even partially obstructed from view. Blocking part of the subject with a tree, building, or something else that won’t pull the focus, can help add mystery or intrigue to your image.
Conclusion
Like repoussoir in art, this classic technique can be used effectively in photography to draw the viewer’s eye. For more compelling imagery, try combining it with other composition techniques.


Hi! Someone in my Facebook group shared this site with
us so I came to take a look. I’m definitely enjoying the information. I’m
bookmarking and will be tweeting this to my followers!
Terrific blog and wonderful design and style.
We’re glad you enjoy it and thanks for sharing.