
Happy Earth Day, everyone! In honor of this big blue marble we call home, we put together a guide of the top 6 drone photography tips required to take perfect aerial photos.
Aerial photography is intimidating to even the most experienced photographers. However, if you keep these tips in mind and remember that photography basics still apply, you won’t have any issues capturing great content with your drone.
1. Exposure Bracketing and HDR (High Dynamic Range)
Taking advantage of exposure bracketing ensures that your shot is perfectly exposed every time. At its most basic level, exposure bracketing is the practice of taking the same shot at 3-5 different exposures (high, average, and low). During the editing process, you combine these photos (preferably captured RAW) to create one perfect, highly-detailed, HDR image.
HDR, or “High Dynamic Range” images are captured with the specific intent of recording details that would otherwise be washed out in very light or very shadowy images. This video does a great job explaining how to create HDR images in Photoshop. We recommend checking it out if you’re new to these concepts and/or are more of a visual learner.

2. Shoot RAW
As mentioned above, when possible you should shoot RAW image files instead of JPEGs. We can’t stress this enough for two reasons. First, RAW images aren’t compressed and hold more visual information. Having all of that info gives you more options during the editing process. For example, it makes effective exposure bracketing possible.
Second, when you’re shooting with a drone, you aren’t working with a huge sensor. For example, even the DJI Mavic 2, one of the best consumer drones on the market, has a sensor size of only 1”. So, utilizing a larger image size is a must.
Yes, we know RAW files are absurdly large and harder to store. To that we say, look into upgrading your backup drive.
3. Fast Shutter Speeds
Taking a steady photograph isn’t always possible without the help of a tripod. Now imagine floating 300 feet in the air being blown around by high-speed winds and trying to get a long exposure shot—it’s not going to happen.
The reason we put so much emphasis on practices like exposure bracketing is that traditional long-exposure shots are next to impossible in drone photography; there is simply too much movement. To get around unsalvageable, blurry images be sure to stick with faster shutter speeds to get the best results.
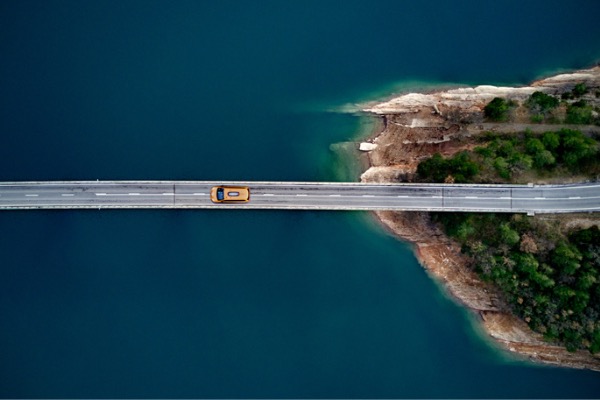
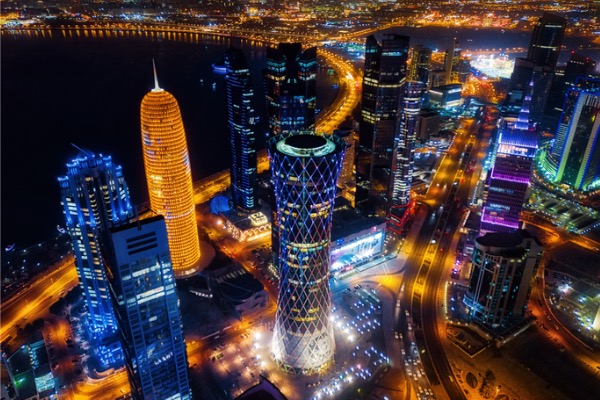
4. Shadows Are Your Friend
Shadows not only lend an interesting visual element to aerial photography but also provide additional perspective. For example, if you’re shooting directly above an object it won’t always be entirely clear what you’re looking at (for example, a bin on a beach). Shadows provide insight into both the size and identity of otherwise obscure items. This brings us to perhaps the most obvious tip on our list: shoot during magic hour.
That magic time in the afternoon provides an increased sense of drama, cranks up vibrancy, and gives you the kind of long shadows that we’re talking about. This is also applicable to a sunrise but who wants to wake up for that?

5. Cheat Your Sensor
As with all things in life, there is a hack for getting a higher-resolution photo with a sensor that offers a low megapixel count. We aren’t talking about upgrading your drone (although that probably wouldn’t hurt). Instead, use the panorama technique.
Building your own panorama is a great way to create high-resolution images and capture a wide range of details that can’t be achieved in a single shot. First, periodically take photos while panning over the scene you want to capture. Then, head to your computer and stitch them together into one complete image. Ta-da! An absurdly easy way to create a high-resolution photo.
Some of the newer drones have built-in Panorama Mode (lucky you). For the rest of us, there is Adobe Lightroom.

6. Have A Plan
Congratulations! You have a beautiful new drone and a totally different perspective than all of the other photographers stuck on the ground. However, that comes with a specific set of challenges. First, drones have a much shorter battery life than handheld cameras. This means less shooting time and much less room for test shots and trial-and-error. Second, the weather is now a pressing factor—your drone is not friends with rain or lightning. Finally, there are location-specific drone laws that keep people from abusing their newfound power of flight (fair enough).
Whether you plan to take a drone with you on vacation to an exotic island or put it up in your backyard, you need to do your research and have a general plan. Can you shoot drone photography there without being chased down by the police? What are your must-have shots? How many can you realistically fit in before your drone runs out of power? Take note of these things before you start shooting.
Do you have any drone photography tips you swear by? Leave them in the comments below!
-
 Regular price: $1,499.00
 -
 Regular price: $999.00


. We talk shadows, file size, and cheating your sensor.)
What a great article!
You’re a lifesaver, thanks for sharing your tips, especially the build your own panorama technique. It’s pretty helpful especially for those that can’t afford to upgrade their drones.
You should take part in a contest for one of the greatest blogs on the web. I’m going to highly recommend this blog!