Long exposure is a popular photography technique that uses a slow shutter speed to capture the movement of a subject in a single frame. A long exposure can ultimately result in beautiful, surreal imagery that visualizes the passing of time.
Of course, if you do it incorrectly, you might just end up with a blurry photograph.
To make sure that doesn’t happen, we’ve created a comprehensive guide to walk you through the process of capturing your own long exposure photos.
What is a Long Exposure?
To understand what a long exposure is, you first have to understand the basics of photography.
A photograph is also called an exposure because it is created when a camera’s image sensor (or film, in a traditional camera) is exposed to light. The camera lens, designed to work like a human eye, filters the light wavelengths so that when they are exposed to the sensor it generates a digital image that replicates what we see.
A long exposure simply refers to the image that is created when the sensor is exposed to light for a longer period of time than for a typical photograph.
The length of time the sensor is exposed is determined by the shutter speed. On a camera, the button you push to take a photograph is called the shutter button. When you push the button it opens the shutter, a barrier that protects the sensor from constantly being exposed to light.
Shutter speed refers to the amount of time the camera shutter is open, and is measured in seconds and fractions of a second. For example, a shutter speed of 1/500 means the shutter is open for one five-hundredth of a second. A shutter speed of 1/60 means the sensor is exposed to light for one sixtieth of a second.
If you are photographing a moving subject, a longer shutter speed – i.e. a long exposure – creates a visually interesting image because it allows you to capture more of the object’s movement within a single exposure.
What You’ll Need
Camera
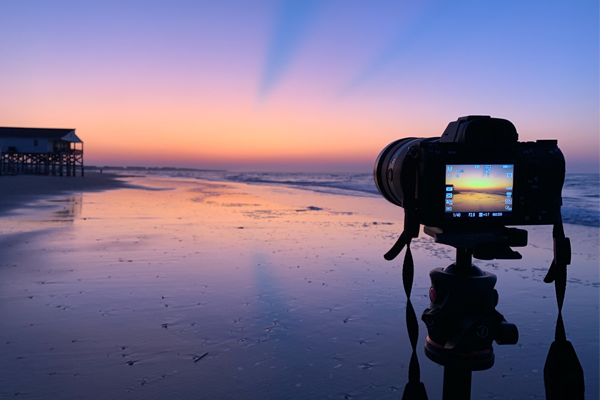
No single camera brand or model is better than all others for long exposure photography, but you will need a camera that performs well in low-light, has bulb mode, and allows you to adjust shutter speed and ISO. A DSLR or mirrorless camera would be best.
Here are some of our favorite cameras that will certainly help you capture great long exposure photos:
- Sony Alpha a7 III 24.2MP Full Frame Mirrorless Digital Camera (Body Only)
- Canon EOS 5D Mark IV DSLR Camera (Body Only)
- Nikon Z6 Mirrorless Digital Camera Body
Tripod
A tripod is critical for long exposure photography as it will ensure the camera remains perfectly still while you’re taking the photo. Even the slightest movement of the camera will disrupt the effect, so handheld is strongly not recommended.
Here are some tripods we recommend:
- Manfrotto Mark 2 Super Professional Tripod
- 3 Legged Thing Punks Anarchy Brian Carbon Fibre Travel Tripod System with Refined Features with AirHed Neo
- Koah Aphelion Professional 6-Feet Tripod with 360-Degree Ball Head
Lens
The lens you end up using will depend on both your camera and what you’re shooting. If you’re shooting landscape, a wide-angle lens will be best.
Here are some great wide-angle lenses you could use on the cameras we recommended above:
- Sony Alpha a7 III – Sony FE 20mm f/1.8 G Full-Frame Large-Aperture Ultra-Wide Angle G Lens
- Canon 5D Mark IV – Rokinon DS 24mm T1.5 Cine Lens for Canon EF
- Nikon Z5 – Nikon NIKKOR Z 24mm f/1.8 S Lens for Nikon Z
Neutral Density Filter
This filter isn’t always needed, but will be crucial if you’re shooting somewhere with a lot of light. A neutral density filter reduces the amount of light entering your lens. Low-light is critical to long exposure photography, and if other circumstances prevent you from shooting in a low-light environment, this filter can help evenly reduce the light exposure. For this reason, a ND filter can also allow you to use a longer shutter speed.
Here are some recommended neutral density filters you can use for the lenses mentioned above:
- Sony FE 20mm lens – Tiffen 67mm Variable Neutral Density Filter
- Rokinon DS 24mm lens – Tiffen 77mm Variable Neutral Density Filter
- NIKKOR Z 24mm lens – Tiffen 72mm Variable Neutral Density Filter
- Click here to see more ND filters
Shutter Release
If you’re planning an exposure longer than thirty seconds, most cameras will require you to use bulb mode and hold down the shutter button for as long as you want the exposure to last (more about this below). Holding down the shutter button will be uncomfortable and could cause you to accidentally move the camera.
To avoid this, it’s recommended you use a remote shutter release – an external remote control you can use to open and close the shutter. Some shutter release remotes can even be programmed to automatically close the shutter after your desired duration. The shutter release can be connected to your camera via cable or wirelessly using bluetooth or infrared.
Preparation
Shooting Location
Long exposure is most often used in landscape photography. As mentioned above, you should be shooting in a low-light environment. Unless you’re using a neutral density filter, shooting on a bright, sunny day will make it extremely hard to achieve the desired effect as the sensor will be exposed to too much light.
If you’re shooting the sky, clouds and stars make for great subjects, as their movement will be captured in the photo (use a shutter speed of at least 20 seconds to capture star light trails). Avoid the sun – if it’s in frame, it will add a disproportionate amount of light and could ruin the photo.
Framing and Composition
Once you’ve found your shooting location, set up your tripod and camera, and frame your shot.
At least one subject in your frame should be moving, but the best long exposure photos typically include both a fixed and moving subject, as the contrast between them accentuates the effect you’re trying to create. Bright moving objects will leave a trail of light, while dark objects may disappear.
Taking care with your framing and composition will only make your photo more powerful. Following the rule of thirds is a simple yet effective way to ensure your subjects are well captured within the frame of your shot.
Focus
You can set focus manually, or use auto focus. If you’re using auto focus, hold down the shutter button to set focus, then, before releasing the shutter, switch your camera back to manual to lock the focus in place.
If your camera has the back button focus feature, it will make it easier to set and lock focus, as it separates the focusing functionality from the shutter button. Almost all DSLR and mirrorless cameras include this functionality, but most require you to change your settings to enable it. Check your camera’s manual for instructions on how you can start using back button focus.
Aperture
Aperture controls how much light enters the camera lens, and is measured using the F-stop, or F-number, the ratio of focal length to the lens’ entrance pupil. A smaller aperture will allow less light to enter the lens, and is ideal for a long exposure shoot.
The specific F-stop you should use will vary depending on when and what you’re shooting, as well as your lens. Every lens has a ‘sweet spot’ – the aperture at which the lens will capture the sharpest imagery – which is typically about 3 stops less than the lens’ maximum aperture. For long exposure photography, you want to use a small F-stop that will still capture a sharp image.
ISO
The ISO setting on your camera determines how sensitive your camera’s sensor is to light. A low ISO means your camera will be less sensitive to light, resulting in darker imagery. A high ISO means more light, but it can also add noise to your image – the grainy texture you can see in some photos. That’s why you should generally keep your ISO as low as possible.
One of the great things about long exposure photography is that your sensor is being exposed to more light than a standard photograph, so you should be able to use a fairly low ISO. Start as low as 100 and increase carefully as you need.
Shutter Speed
The shutter speed used for most photography is typically 1/60 or faster. For long exposure photography, you want to expose your sensor for much longer – multiple seconds, instead of fractions of a second. Anything over 1 second could be considered a long exposure, but the longer the shutter speed, the more likely your image will be visually striking.
Bulb Mode & Shutter Release
If you’d like an exposure longer than thirty seconds, switch your camera to bulb mode. Most cameras will restrict your shutter speed to 30 seconds by default. Bulb mode enables you to use whatever shutter speed you desire – as long as the shutter button is held down. Use a remote shutter release to avoid holding down the shutter button.
Check Exposure Using Histogram
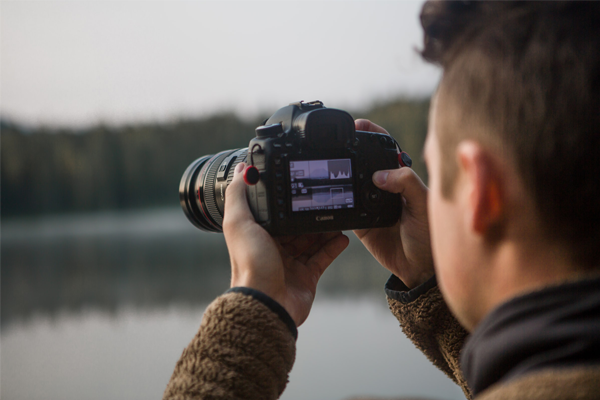
Once you’ve determined your shutter speed and aperture, and you’re happy with the focus and framing of your shot, take a test photograph and check the histogram. The histogram is a graph that shows the amount of light distribution across your image, and is the best way to assess exposure. Most DSLRs and mirrorless cameras will allow you to see the histogram for each photo.
There is no exact reading on a histogram that is best, but it will make it clear when the image is too dark or too bright. A spike on the left side of the graph will indicate the image has too many dark pixels (under exposed), while a spike on the right side suggests too many bright pixels (over exposed). Adjust the aperture, shutter speed, and ISO as needed to increase or reduce the amount of exposure.
Add Neutral Density Filter
If you’re using a ND filter, wait until after the test photo (and you’re happy with the exposure) to put the filter on the lens. This is because, depending on the strength of the filter, it may make it impossible to see through the viewfinder or LCD screen.
Once you’ve added your filter you should adjust the shutter speed accordingly based on how many stops were added by the filter. To determine your new shutter speed, use the following equation:
Original Shutter Speed x 2ND = Filter Shutter Speed
(ND = the filter’s stop value)
For example, if the shutter speed you used without the filter was 1 second, and the filter you’re using has 6 stops, your equation would be:
1 x 26 = 1 x 64 = 64
The shutter speed you should use with the filter should be 64 seconds.
If you don’t feel like doing math, there are also a range of mobile apps available, such as Long Exposure Calculator, that can help you determine the best shutter speed to use when utilizing a ND filter.
Take the Photo
You should now be ready to take a photo! Depending on what you’re photographing, there are a number of techniques you can use to capture truly beautiful images.
Techniques
Motion Blur

Motion blur is the photographic term for what movement looks like when it’s captured in an image. Every long exposure photograph contains some kind of motion blur because, well, that’s kind of the point. It might be as simple as a photo of someone running, or cars driving along a busy highway.
Silky Water
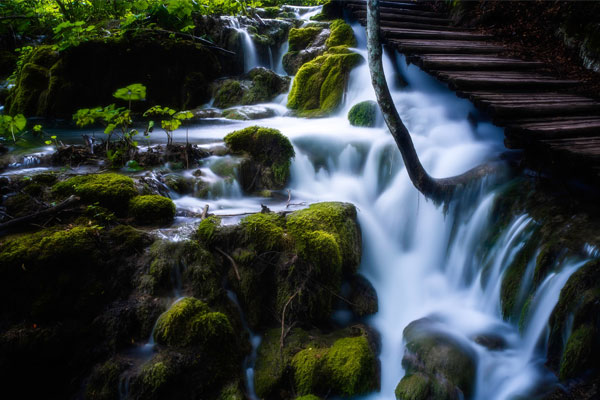
Long exposure photographs of water can generate really fascinating imagery. Using a neutral density filter will allow you to photograph water during the day using an extremely slow shutter speed. Depending on the motion of the water, the resulting imagery will give the water a silky, flowing appearance.
Light Painting
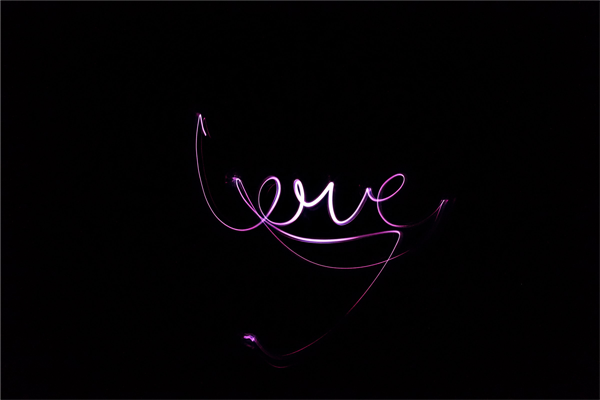
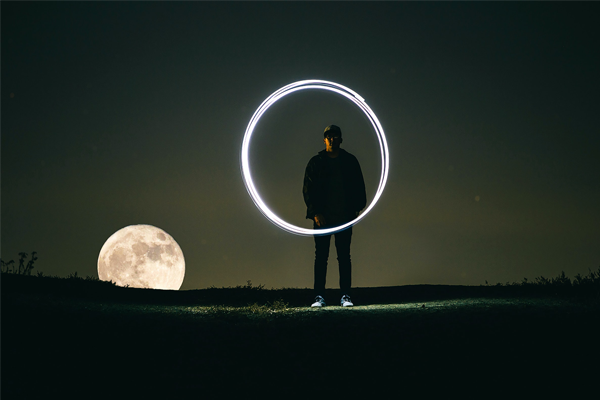
Light painting is all about capturing the motion blur of a brightly lit object contrasted with a dark background. Once you’ve got the basics of long exposure down pat, light painting is also pretty easy to pull off. You just need a dark space and a brightly lit movable object, such as a sparkler or glow stick. For more information about getting started with this technique, click here.
Send Us Your Best Photos
You should now have everything you need to try long exposure photography. So what’s next? Try it out! If you take a photo you’re particularly proud of, don’t be afraid to share it with us by sending us an email or reaching out on Instagram, we would love to see it. If there’s anything important you think we missed in our guide, leave us a comment below!


