
The best lighting for outdoor photography depends heavily on where, when, and what you’re shooting. Different styles of photography require different equipment and techniques to achieve optimal lighting. This is especially true when you’re outside, and at the mercy of your surroundings.
When shooting inside, you can more easily control the light, shadow, background, and other factors that make up your mise-en-scene, a cinematography term referring to everything that’s in frame (or has an impact on what’s in frame). Controlling these elements is decidedly more difficult the moment you step outside.
Despite the challenges, outdoor photography can also be very rewarding. You can’t photograph picturesque scenery or wild animals inside a studio. Shooting outside also allows you to take advantage of natural light. Below, we’ve compiled some outdoor photography tips for lighting, broken down by style, so that you can adequately prepare for your next outdoor shoot.
Landscape Photography
 While it can be fickle, natural light can also be used to great effect in landscape photography. Once you start observing and understanding how sunlight is impacted by the time of day, weather, and your surroundings, you will start to learn how you can manipulate it to achieve your desired results.
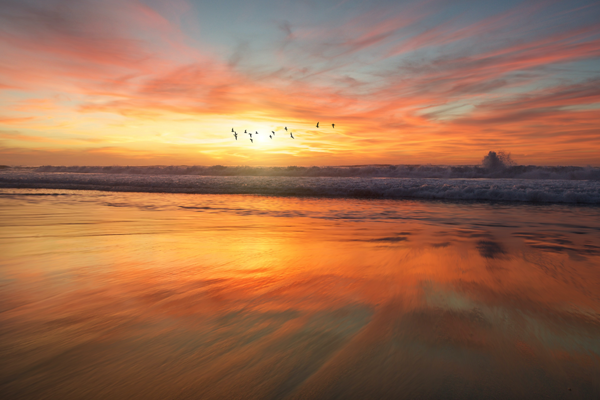
The golden hour is generally considered the best time of day for outdoor photography. More specifically, this refers to the hour immediately following sunrise, or the last hour before sunset.
In the middle of the day sunlight is brighter and more direct, creating harsh shadows. During the golden hour, when the sun is closer to the horizon, the light it emanates is more diluted by the atmosphere. This results in softer, reddish light that is ideal for capturing visually pleasing photos. In fact, you’ll likely observe an array of different hues as the sun either sets or rises. This provides an opportunity to capture unique, colorful imagery.
Of course, you don’t have to wait for the golden hour to capture a great landscape photo. Sometimes, shooting in the middle of the day matches your creative goals. You can utilize harsh shadows to produce fascinating visuals. Alternatively, you can find ways to filter the light so it’s less intense. In a rainforest, sunrays filtering through the trees can look ethereal. You could also use a lens filter. For example, a neutral density filter will evenly remove the amount of light entering your lens, relieving pressure on the dynamic range of your camera.
On overcast or rainy days, the natural light will have a different impact on your photos. Even in the middle of the day, the light will be softer, with blue tones instead of red. If you’re planning to use natural light, you need to plan ahead. Check the weather predictions in the days leading up to your shoot. If you want warm, bright photos, it doesn’t make sense to go shooting on a day with poor weather. That’s not to say you can’t capture great landscape photos on an overcast or rainy day. Ultimately, it depends on your creative vision. Natural light can be unpredictable, but if you know what you want, planning ahead will help you achieve your vision.
Outdoor Portrait Photography
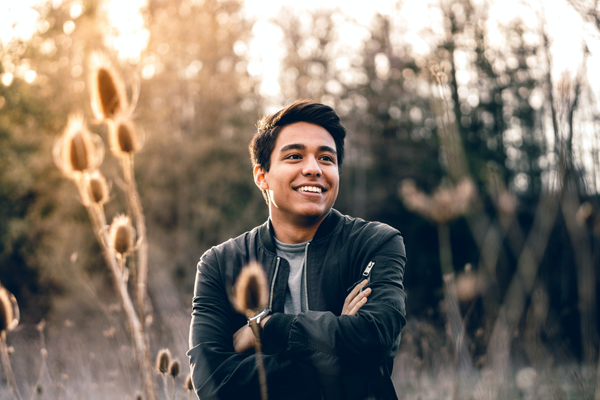 The golden hour can be a good time for outdoor portraits as well, however, you need to be well prepared. Timing is of essence when it comes to natural light, especially during the golden hour when the light can dramatically change within the span of several minutes. It will be difficult to take multiple portraits with a consistent look and feel as the light will be constantly changing.
Shooting portraits in the middle of the day, you have to be mindful of the amount of light entering your lens. On a bright, sunny day, the light will create harsh shadows and can wash-out the skin tone of your subject. It’s recommended that you move the subject to a shaded area, or in a position where no hard light is hitting their face.
Another issue you’ll likely encounter is an overexposed background. Fill flash is a technique you can use to correct this issue. It will require the use of a camera flash. The flash built-in to your camera may work, however if you find yourself taking a lot of portraits, it’s probably worth investing in a more powerful external flash.
First, adjust the ISO and aperture on your camera so that the background of your shot is exposed correctly. This will make your subject dark, but that’s okay. When you take the photo, the flash is going to illuminate your subject without impacting the background, resulting in an evenly exposed photograph. To get the perfect exposure, you may have to adjust the settings on your flash or camera, or change the distance between you and your subject. You want the subject’s face to be well-lit, but not so bright that it’s obvious you used a flash.
You can also use a light meter to calculate what camera settings you should use for an optimal exposure. While most cameras have a built-in light meter, they’re less reliable. They measure reflected light, which is the amount of light that’s reflecting off your subject. Alternatively, an external incident light meter will measure how much light is falling on your subject. Holding the meter near their face and facing it towards the light source, it will tell you the exact camera settings to use for a good exposure of your subject. You can even use the meter in conjunction with a flash.
Macro Photography
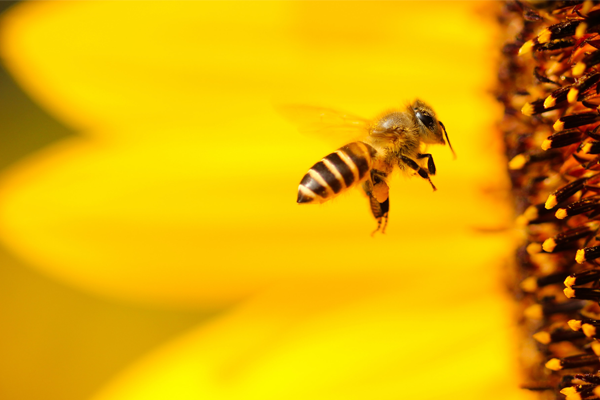 Macro photography is a popular outdoor photography style. It involves taking extreme close-up photos of just about anything, although often the subject is an insect, flower, or naturally-occurring texture. Good macro photographs are often vividly colored, capturing an otherwise small subject in intricate detail.
Photographing anything on such a small scale means that lighting is paramount. Depending on your lens and camera, the sun will often provide enough light to adequately light your shot. In fact, like the other styles, on a bright day there may be too much natural light. If your subject isn’t mobile, you may need to wait until they’re in the shade or the sun is behind a cloud before taking your photograph. Overcast days can be great for macro photography when the natural light is softer.
If you find that you don’t have enough light, you may need to use a flash. You shouldn’t use the built-in camera flash. You’ll likely be very close to your subject, and these flashes aren’t designed to work in close proximity. Use an external flash if you can, and hold it to the side of the camera, further away from your subject. Like with an outdoor portrait, you’re trying to introduce fill flash. That is, enough light to fill in the shadows and properly expose your subject without making it obvious you used a flash.
If you’re photographing an insect, a bright flash may scare them away. If you only need a little more light, you might get away with just using a reflector. A silver reflector, held beneath your subject in the light, will allow you to add more reflected natural light into the shot.
Summary
While there are other styles, generally speaking the best lighting for outdoor photography is natural light. However, the time of day, weather, and your camera settings can be critical to ensuring your photos turn out great. You may also wish to invest in some outdoor photography equipment such as an external flash, light meter, or reflector.
While we hope the tips above will help you, the best way to master outdoor photography lighting is to take your camera outside and start experimenting. Pay attention to how natural light changes throughout the day, and how you can use your camera settings and accessories to your advantage. Golden hour or not, there’s always something interesting to photograph outdoors.


