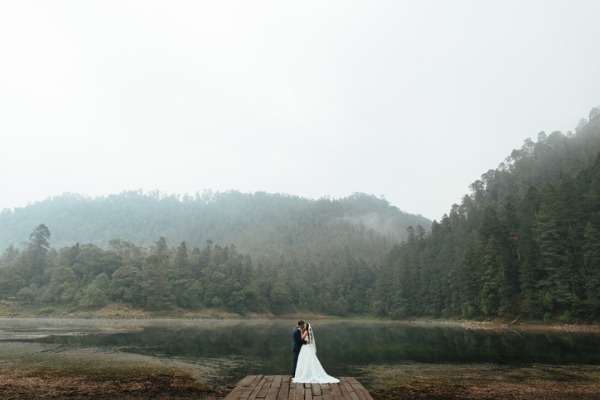
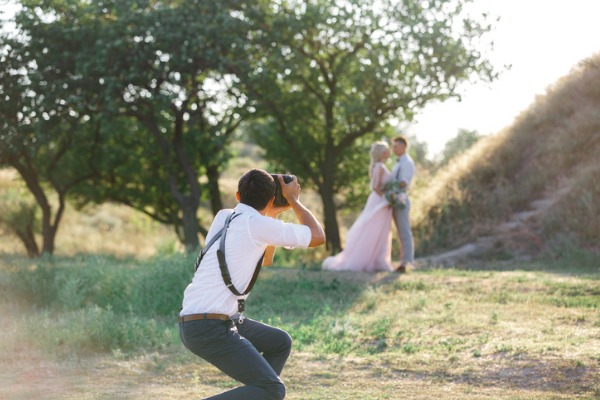
We get a lot of questions about best practices for event photography, specifically weddings. It doesn’t help that there is a lot of contradictory information scattered across the Internet about the best wedding photography lenses. To save you a lot of time, frustration, and confusion, these are the only three focal lengths you need: 12-24mm, 24-70mm, 70-200mm.
As mentioned above, these numbers indicate the focal length. For the newbies out there, focal length refers to the angle of view or how much of the scene in front of you is captured. In short:
Short focal length (12-50mm) = wide angle, captures the whole scene
Long focal length (55-200mm+) = narrow angle, captures less of the scene
One more thing before we get started! If you’re struggling to find the exact lens you want for your camera we suggest looking into a lens converter. These handy little add-ons can save you a lot of money; converters allow you to expand your lens search into additional, potentially more affordable brands.
When to use it: this lens is intended to capture the bigger picture. Bust it out when capturing all of the craziness happening on the reception dancefloor or the sweeping surroundings of the happy couple.
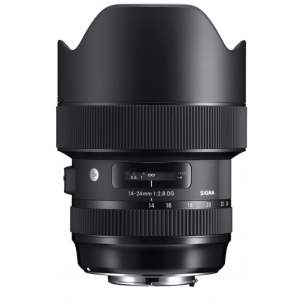
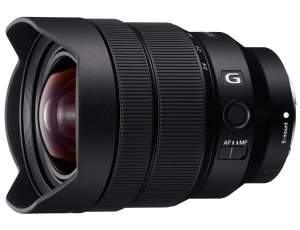
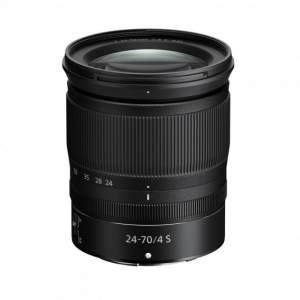
*These two lenses are interchangeable based on your camera brand of choice. The important takeaway here is that you need this specific range in your camera bag’s arsenal.
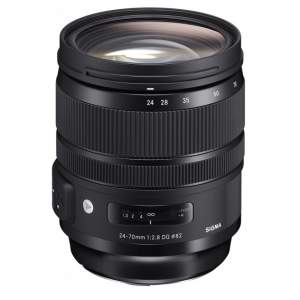
2. 24-70mm Lens
When to use it: Utilize the 24-70mm lens for formal group shots of the bridal party/ guests and detailed photos of decorations. This is the most versatile of all three lenses and made to replicate the 18-55mm kit lens that normally comes with a DSLR. However, it’s intended for full-frame bodies and has significantly better low-light capabilities.
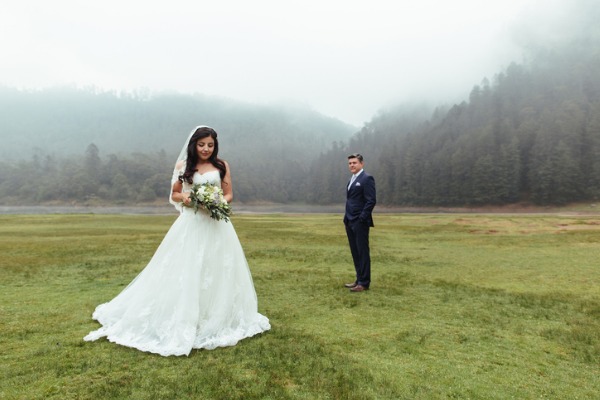
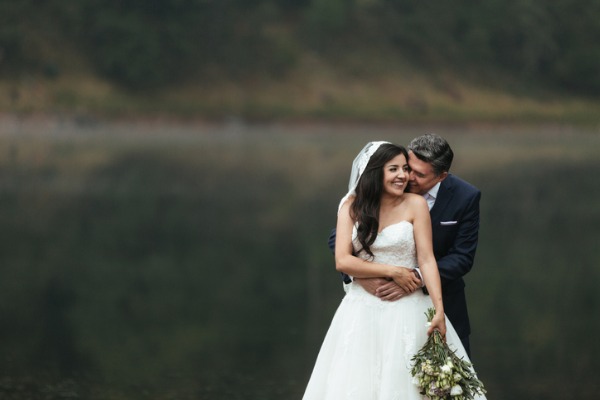
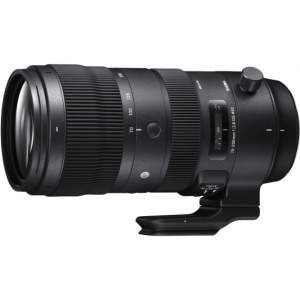
When to use it: Close-up portraits from a distance. 70-200mm lenses give your subjects a little more space so you can blend into the background and get better candids from further away. These lenses are often pricy but certainly worth the splurge. This investment equates to edge-to-edge sharpness, reduced flare, and fewer chromatic aberrations.
Sony announced its newest vlogging dream camera: the Sony RX0 II. This is the second addition to the RX0 line since it was first released in September 2017. You can preorder the Sony RX0 II here. In the meantime, scroll down to see the Sony RX0 II’s specs, features, upgrades, and product photos.
The signature feature for many of the new professional vlogging cameras is a tilting LCD screen. While the original RX0 lacked this handy addition, the RX0 II now offers an adjustable LCD screen that tilts upward 180° and downward 90°. It’s even functional underwater!
Eye Autofocus
Sony’s impressive Eye AF is included in the palm-sized RX0 II with increased speed and accuracy. Users can select the AF type to be left, right or auto in the menu or assign this setting to a custom button in order to quickly and easily switch modes. Plus, the new “Soft Skin Effect” can be applied in-camera to cover your subjects’ imperfections.
Features
1 of 10
Image Stabilization
It’s tough to compete with GoPro and DJI in terms of in-camera image stabilization, but Sony makes a valiant effort with this model. The Sony RX0 II has two layers of assistance. First, it has built-in electronic image stabilization with a full pixel readout to eliminate pixel binning while you record. Second, stabilization can be enhanced in the Movie Edit add-on app using gyro info captured while shooting.
Focal Range
You’ll notice in the chart above that most of the lens and resolution information is the same between the RX0 and the RX0 II. However, one very notable difference is the focal range; the RX0 II has an improved minimum focal distance is 7.9 inches (20cm) which is optimal for selfies and close-up shots. However, the original has a minimum focal distance of 1.7 feet (50cm).
Sony RX0 II In-use Images
1 of 20
Waterproofing
Finally, the RX0 II is waterproof down to 33 ft (10m) without any additional underwater housing while the RX0 is only waterproof to 3.3ft (1m). It’s worth noting, however, that the minimum focal distance increases underwater, causing the angle of view to narrow.
Yes or no: do you want to try out the new Sony RX0 II? Is it worth the upgrade from the original? Let us know in the comments.
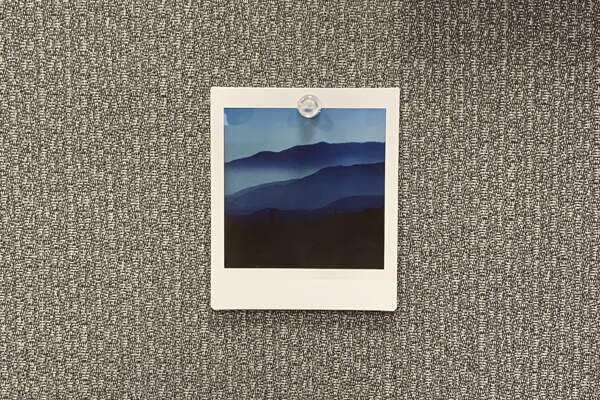
The Fujifilm Instax Share SP-3 Printer is the perfect companion for your smartphone or digital camera. The printer connects wirelessly with your digital device and exposes images onto instant film. That way, you get the look of a vintage photo without the necessity of carrying an instant camera with you.
In this post, we show you the (easy) prerequisite steps to print photos directly from your digital Fujifilm camera to the SP-3. We used the Fujifilm X-T3 for this example. However, the steps should be reasonably similar for any other digital Fujifilm camera.
If you have any questions or don’t understand how to connect the SP-3 with your camera, feel free to leave your queries in the comment section below.
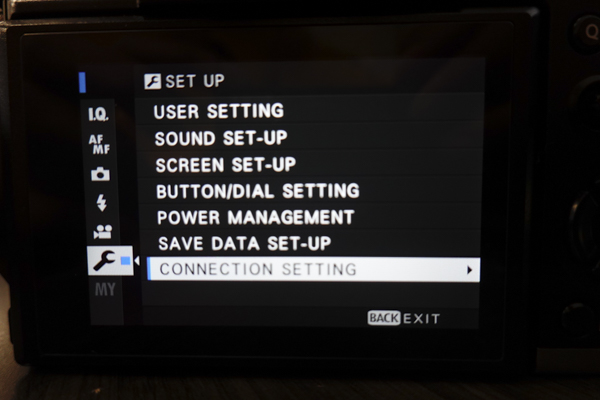
1. Enter the settings menu of your Fujifilm Camera and go to Set-Up
2. Select “Connection Setting”
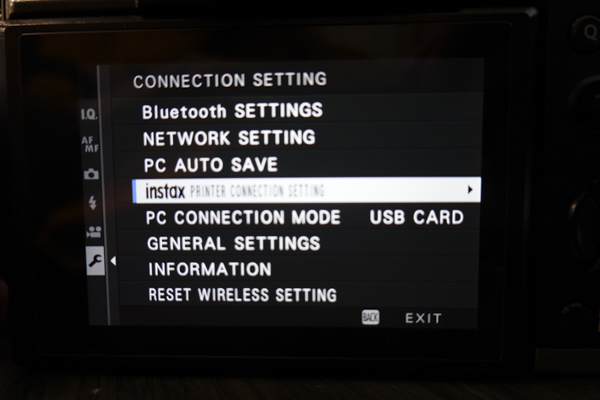
3. Select” Instax Printer Connection Setting”
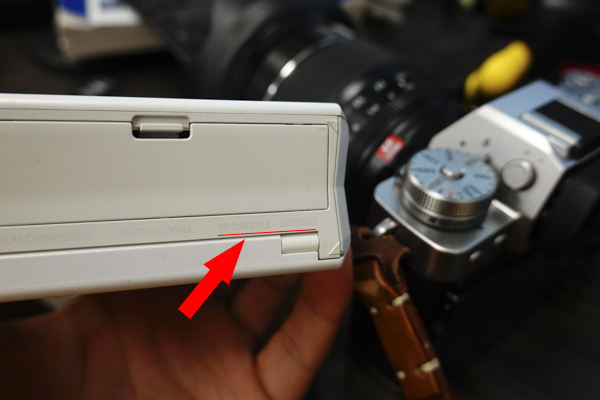
4. Locate the product number for your device on the bottom of your printer
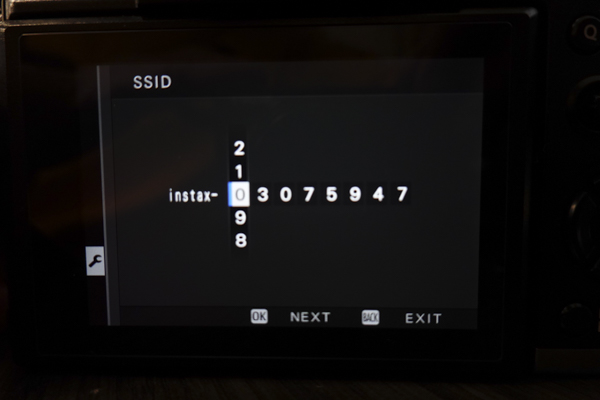
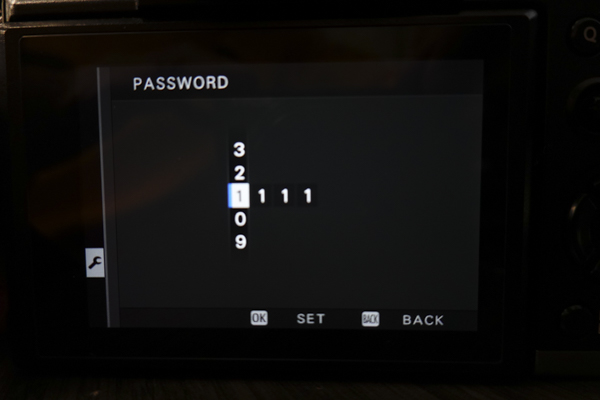
5. Enter the number starting with “Instax-########”
6. If you recently purchased the Fujifilm Instax Share SP-3 Printer or simply never changed the default password, the default password should be “1111”
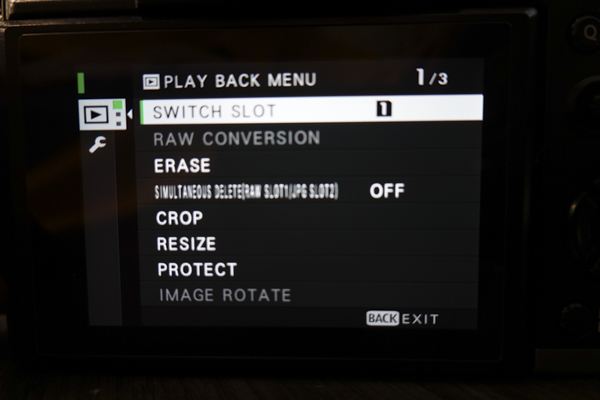
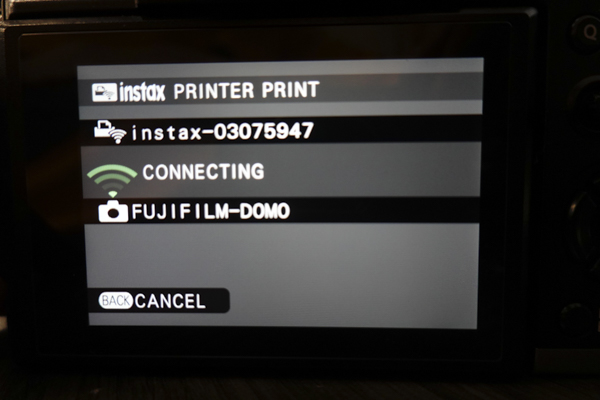
7. Press the “Play Back Menu” button, then the “Menu/Ok” button which brings up another menu
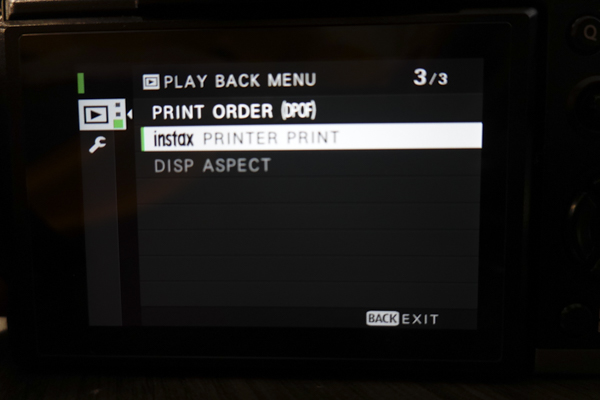
8. Select “Instax Printer Print”
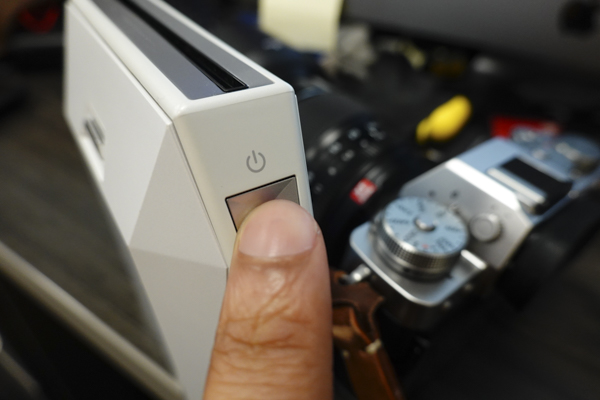
9. Turn on the Instax printer
10. The camera will now connect with the Fujifilm Instax Share SP-3 Printer
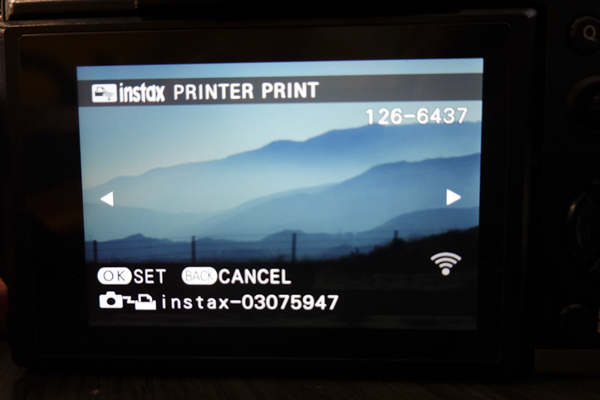
11. Navigate to the image you would like to print
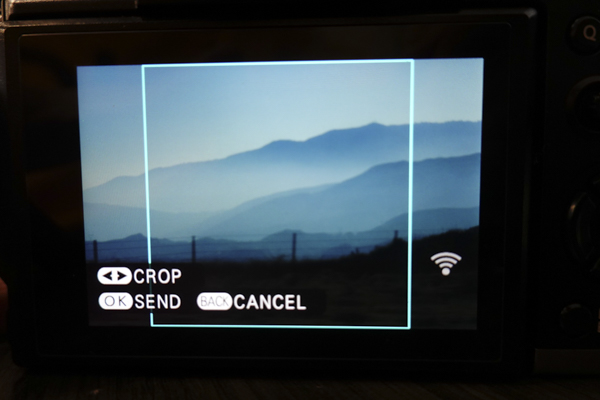
12. Move the square selection tool around the screen to select which part of the image you want to print
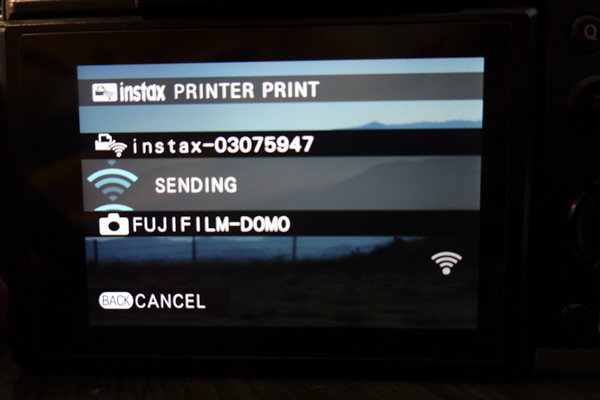
13. Click OK to finalize your print
14. Enjoy your print!
How would you use a Fujifilm Instax Share SP-3 Printer? Let us know in the comments!
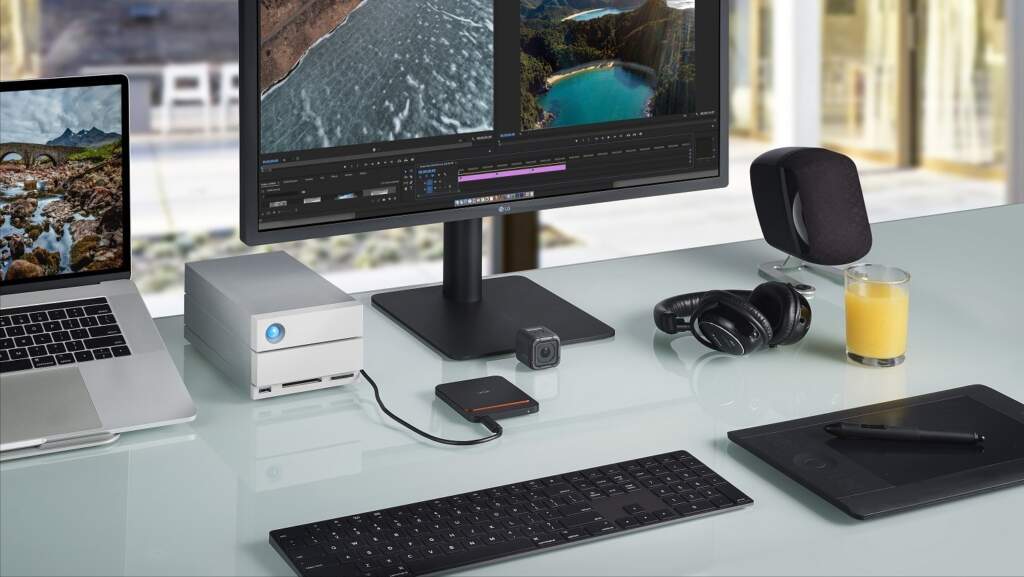
It’s no secret that we’re LaCie fans. One of the latest additions to their external hard drive family is the LaCie Portable SSD. In this post, we review its size, durability, speed, and compatibility.
The Portable SSD comes with the classic value-added features we’ve come to know and love from LaCie including customizable backup schedules, one-click backups, and multi-device sync. Plus, one free month of Adobe Creative Cloud for those of you who still haven’t committed to a license yet.
SSD stands for “solid state drive.” Unlike its counterpart the spinning hard drive, an SSD has no moving parts (hence the name solid state). This is advantageous for a few key reasons. First, the lack of moving parts means that there are fewer elements to be broken or worn down. Second, SSDs are usually faster. And finally, they’re often smaller and quieter.
LaCie Portable SSD Size
If you’re a photographer or videographer who travels a lot for shoots, this little guy is a perfect fit for your pocket or bag. It’s also (in our humble opinion) aesthetically pleasing compared to some of the other clunkier external drives on the market.
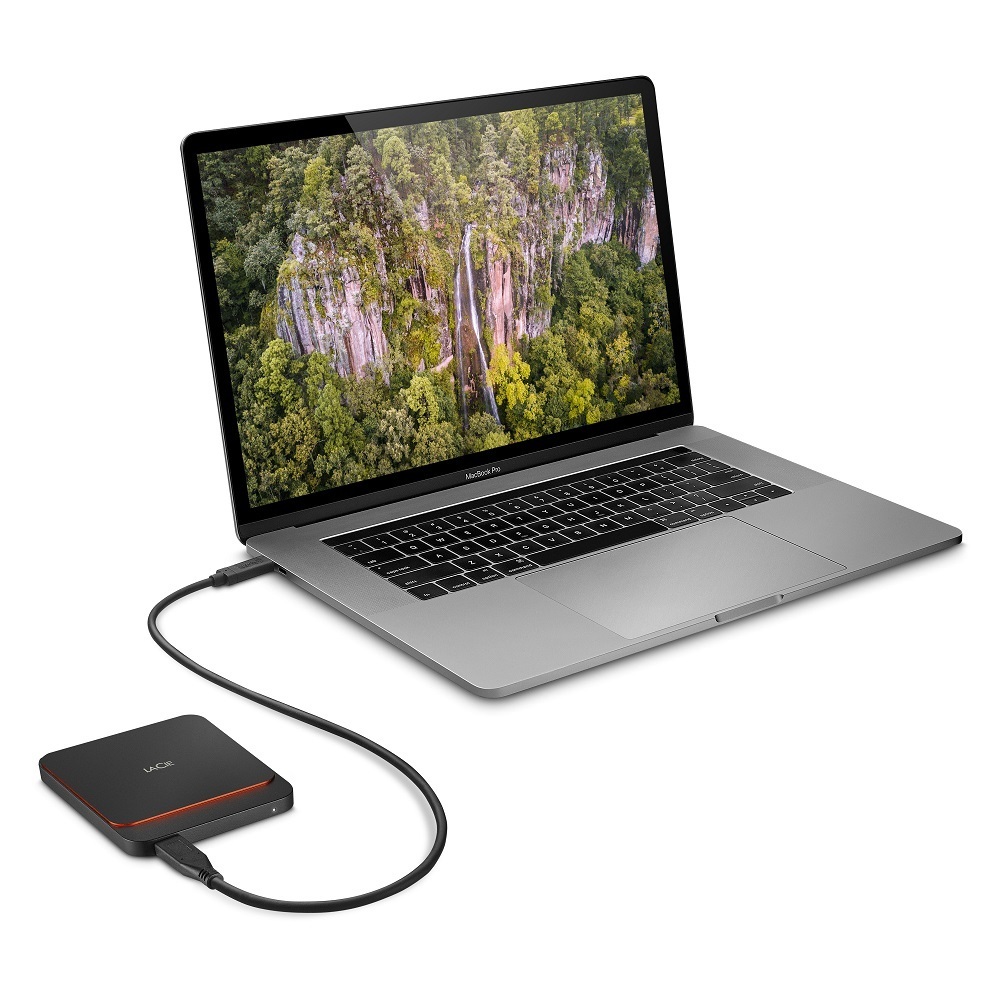
The Portable SSD is tiny. This palm-sized device comes in 1TB and 2TB iterations and weighs a mere .22lb (0.1kg). In terms of dimensions, it’s 3.7in long, just over 3in wide, and about .36in thick. Even if you’re not planning to jet set with the Portable SSD it’s still great for storing a lot of content in a small footprint.
Speed & Compatibility
In addition to its small size, the Portable SSD’s claim to fame is its speed. It can transfer an hour of footage in less than a minute at 540 MB/s for Mac and Windows using USB 3.0 and USB-C. It’s also capable of supporting multiple streams of 4K video simultaneously.
LaCie embraced the USB-C movement with this model and included a reversible USB-C cable in addition to a USB 3.0 to USB-C cable for legacy laptops.
Durability
Traveling with electronics always begs the question of durability—can my device stand up to the depths of my laptop and/or camera bag?
LaCie is known for its line of Rugged drives; while the Portable SSD isn’t as durable as those items, it is shockproof up to 2 meters. If you’re still not convinced, it also comes with a 3-year warranty so you can rest easy knowing your content is safe.
Do you think the LaCie Portable SSD is worth all the hype? Let us know in the comments below.
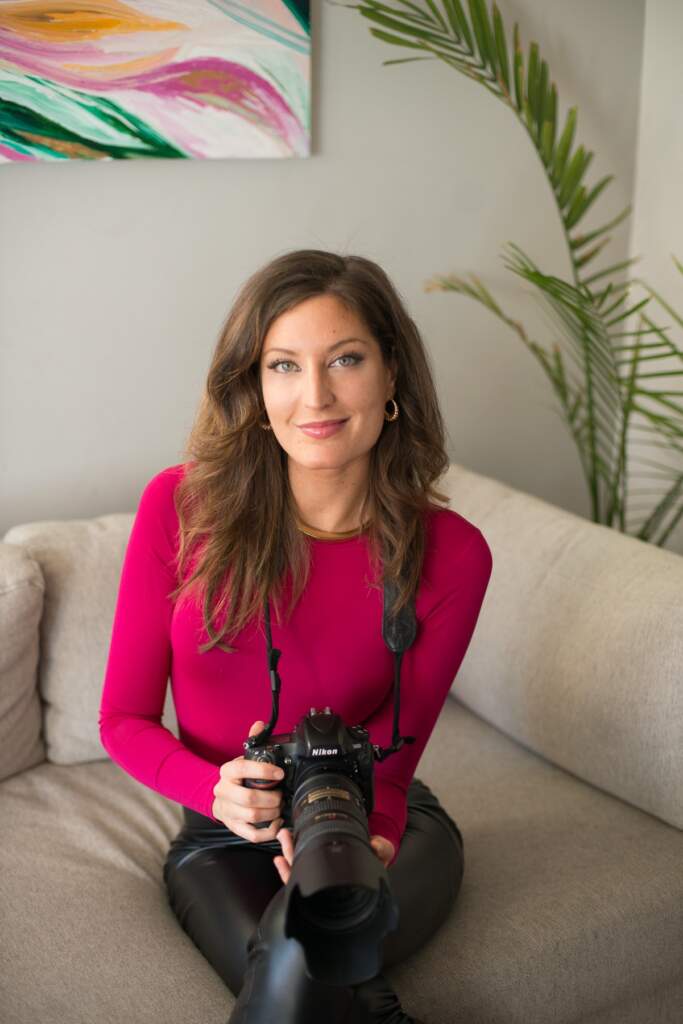
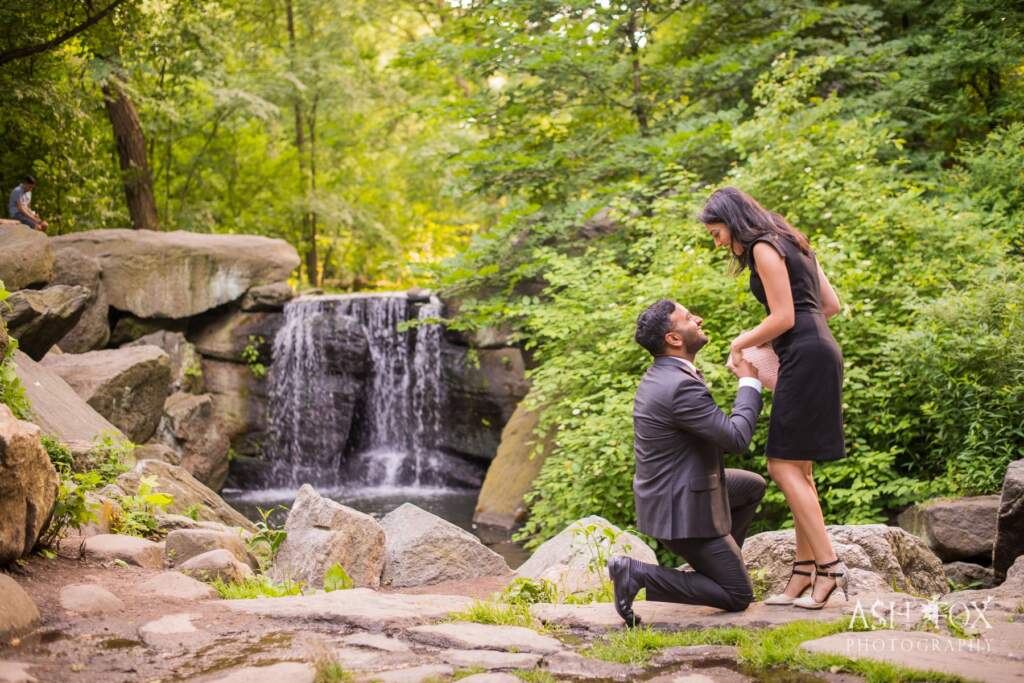
Happy National Proposal Day! To celebrate this romantic holiday, I spoke with Ash Fox—New York City’s master of proposal photography. Ash has captured (and created) over 1,500 dreamy proposals for everyone from the nervous bachelor next door to NFL superstars.
Ash Fox is exactly the kind of photographer I hoped she would be. After shooting over 1,500 proposals, it’s possible (dare I say likely) to become jaded. This is especially true in a place like New York where the only thing that runs higher than price tags is the expectation for perfection. However, it’s clear that six years and over a thousand love stories later, Ash still loves love.
Her method of combining the personalities of her clients with the sharp, informed eye of an artist is what makes her work so engaging.
“I’m somewhat of a perfectionist,” she said, reflecting on her style. “I’m also someone who wants to be honest with people and give them my true opinion and help as much as I can.” Armed with her Nikon D800, Ash’s role naturally evolved from a proposal photographer to a photographer and planner as she worked with each client.
Whether people are looking for something simple and intimate or totally over the top, Ash does everything from booking the venue to choosing people’s outfit for the big day.
“I’m very, very hands-on,” she continued, “and I realized that I could help with a lot more than just the pictures. Of course, that’s what I do, but there’s a lot that can make a picture way better and make a moment better. That’s just kind of my nature—if I see something that’s off I’m like, wait…no no. I don’t want this off thing to ever happen! I want to fix it.”
Creating A Game Plan
As mentioned above, Ash is in full control of the day-of proposal execution. However, she’s also the one running idea interference during engagement prep.
“I’ve got people that come to me with a fully fleshed-out plan and I’ll see a million different problems,” she said woefully. It’s not that the ideas are bad, necessarily, just impractical in terms of execution.
“I have to break it to [people] you know what? This is not really … I think we gotta cut the flash mob; The caricature artist has gotta go; These family members need to take a step back. These little things add up to make it one big mess or mess up the timing.”
I asked about the most ridiculous proposal photography requests she’s ever gotten. I specifically joked about renting a castle for that magic moment. Without skipping a beat, Ash replied, “oh, yeah. Well, we’ve done the castle. That has actually has been done.”
Of course.
In case you were wondering, helicopter proposals have also been done. The real issue is unrealistic expectations related to budget restrictions, an idea that—as a New Yorker myself—I find highly relatable.
“I get people who want things that are so far out of what is actually possible in New York City without a million-dollar budget.” It is Ash’s unfortunate task to bring these dreamers back to earth.
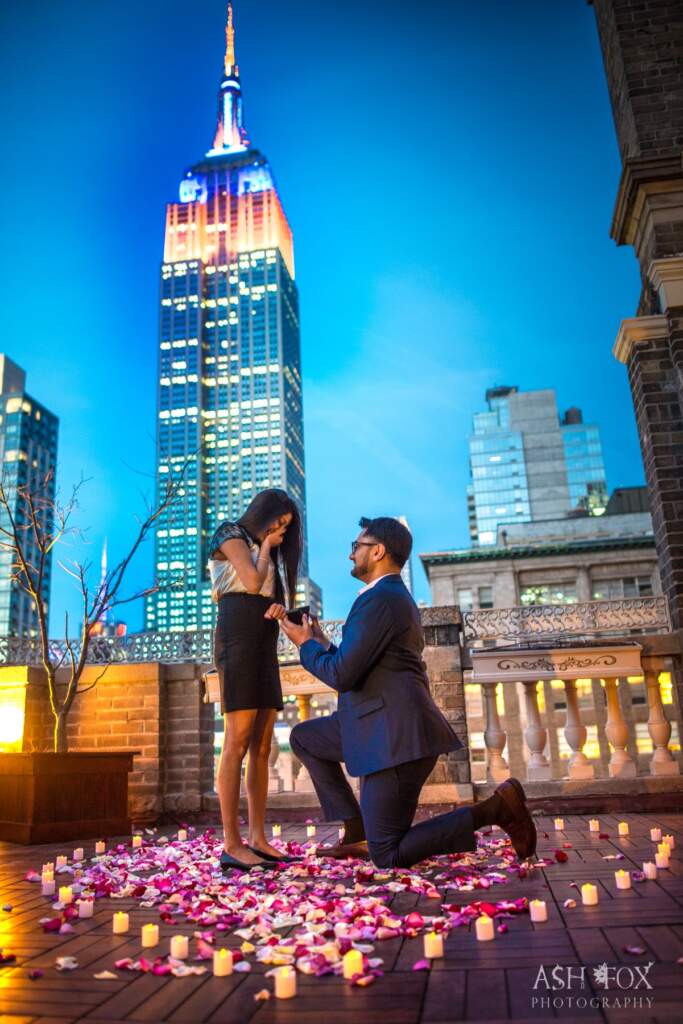
“Sometimes people don’t know what certain things cost so they’ll ask for 20 Met Opera ballerinas or a massive penthouse overlooking Central Park with fireworks outside the window. There’s no… you can’t get a permit for fireworks in New York City unless you’re Macy’s.”
For what it’s worth, I checked and she’s absolutely correct. Macy’s 4th of July display is the largest Independence Day fireworks display in the nation. Everyone else is lucky to get a drone in the air. That said, Ash has booked penthouses for proposing NFL players looking to make a grand gesture.
“It’s New York so everything’s just managing people’s expectations.”
Long-Term Love Affairs
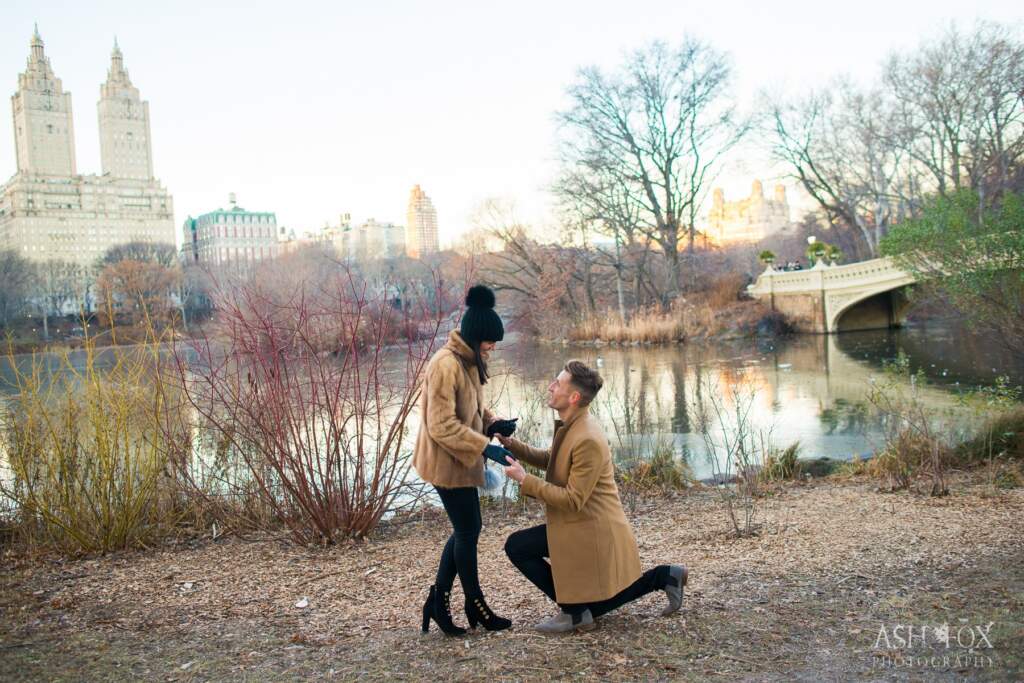
If the photo evidence isn’t enough to convince you that Ash is a consummate expert, the fact that a client has never been turned down during one of her proposals is a solid indicator.
“There have been some breakups but I’ve never had a no.” Well… close enough.
Ash balked when I asked her if there are any stand-out stories that keep her invested in her work.
“It’s so hard to call out one story! It’s not… it’s more of what I get out of it I guess,” she said. “It’s obviously business, but [the connection with the couples] is a big part of it for me…It’s obviously not every single couple—you don’t get the same interaction with people in a hurry. But there are couples that I’ve stayed connected with going on six, seven years.”
Initially, this blew my mind. Seven years?
But the more I think about it, the more it makes sense. Ash is the helping and confident hand present at the start of a couple’s marital journey. At this, the cusp of heightened, wedding-related stress, Ash is the person setting the tone for the next year or more of their lives; she is the gatekeeper of nuptial sanity. This is not a task Ash takes lightly.
“It’s very meaningful to be a part of people’s lives and this milestone….I try to help [clients] find or refine an idea and think about things from every angle so that, not just visually, but strategically they have the best proposal possible.”
Remote Assistance
Ash Fox is a one-woman operation local to New York City which makes her time both valuable and limited. To help those outside the tri-state area, Ash is launching The Proposal Podcast. Each episode is a 15-minute dose of advice and answers to crucial proposal questions from timing to dealing with family.
These are not New York-centric questions so you can contact Ash from anywhere in the country (or world, for that matter) and get the proposal photography info you need. The easiest way to submit questions is through a direct message on Ash’s Instagram @AshFoxProposals.
“There’s a lot of info on weddings and planning weddings but there’s really nothing about proposals. This is a relevant topic for a lot of people and they don’t know where to start. This way they can sneak off, put their headphones on, and get professional help without even having to pay anyone. It’s free advice.”
In this post, we compare the Sony 135mm f/1.8 lens with the Sony 85mm f/1.4. Both are good options for someone interested in a dedicated portrait lens, but each has specific pros that can make it better suited for specific shooting needs.
These are very similar lenses. However, there are two key difference makers that make a notable change in usage. The first is autofocus speed. The Sony 135mm f/1.8 has four linear motors while the 85mm f/1.4 only features two. The result is a marked difference in autofocus speed; as depicted in the video, the 135mm is significantly faster than the 85mm. This isn’t necessarily a deal breaker for the 85mm if you plan to use it specifically for portraits. However, if you plan on using it to take action shots it would behoove you to choose the 135mm.
Image Comparisons
1 of 6
135mm, 1/6400, f/1.8, ISO 100
85mm, 1/6400, f/1.4, ISO 100
135mm, 1/6400, f/2, ISO 100
85mm, 1/6400, f/1.4, ISO 100
135mm, 1/1000, f/1.8, ISO 100
85mm, 1/1250, f/1.4, ISO 100
Focus Settings
The other key difference is the number of focus hold buttons present on these lenses. For a little background, a focus hold button does exactly what it sounds like; when you have the level of focus you want, simply press this button and it will remain the same regardless of where you or your subject moves.
The Sony 135mm f/1.8 has two focus hold buttons strategically placed on its body while the 85mm has one. As a result, using this feature is a little bit easier when using the 135mm. Again, we wouldn’t classify this as a deal breaker if you don’t use (or intend to use) this feature. However, it’s definitely a nice option to have.
Conclusion
The Sony 135mm and 85mm lens are both great options for someone looking for a dedicated portrait lens. The Sony 135mm is priced at $1,898 and the 85mm at $1,798. But with that extra $100 you are getting newer technology.
This is a friendly reminder that Focus’s Sony Trade-in event going on until March 30th. Through that program, you can trade in your qualifying used camera body or lens and get up to a $200 trade-in bonus when purchasing the 85mm f/1.4 lens!
If you haven’t done so already, check out our video comparison of the Sony 135mm f/1.8 and Sony 85mm f/1.4 lenses. If you enjoy it, don’t forget to like and subscribe to our channel for more content.
In this post, we detail the 4 event photography tips you need to successfully capture any occasion. They include getting your scope of work in writing, how to present yourself, required gear, and the day-of timeline.
Speak with your client before the event to establish their expectations. Is there a specific aesthetic they have in mind and, if so, what is it? How many photos are included in your fee? Is there an extra cost for editing? Is there a specific dress code you must abide by (e.g. all black)?
You should also take this time to discuss must-have shots. For example, will there be keynote speakers, awards, or any other planned, picture-worthy moments? For the most part, clients will want you to tell them what’s best (you are the expert here). So, enter the prep meeting with a pre-established idea of the shots you need based on the type of event. For bonus points, get the event’s schedule in advance of this meeting so you already have an in-depth outline when it begins.
Under Promise, Over Deliver
Set reasonable expectations for the scope of your work that you know you can meet. The last thing you want to do is overcommit before the event even begins. By setting the bar at a sensible level, you can exceed your client’s expectations—a practice that goes a long way to encourage tips and word-of-mouth recommendations.
Once you’ve agreed on the terms of the gig, capture all of it in writing and have your client sign off on the parameters.
Work With A Lawyer
That’s right. Have a real, live lawyer take a look at any contract you plan to sign or have a client sign. Yes, there are dozens of free photography contract templates available online. Yes, we know that legal counsel isn’t always in the budget for photographers. But, it’s worth verifying (at least once) that the contract you use to lock down pricing and scope is in your best interest.
2. Presenting Yourself
Dress Code
This is already taken care of if your client has a specific dress code they’d like you to abide by. However, there are two basics to consider when choosing what to wear for an event shoot.
First, try to blend in. Your employer might not care if you wear jeans to their upscale event. However, depending on the function, you may feel uncomfortable in sneakers if everyone else is in formal wear. Eliminate this potential distraction and dress accordingly.
Second, does your outfit facilitate flexibility? Can you crouch, lean, and gracefully dodge people in your clothing of choice? If not, re-think it. Instead, wear something that allows you to snap photos at interesting angles and choose shoes based on the assumption that you’ll be on your feet for hours.
Interacting With Your Subjects
Read the room. If it’s a boisterous bunch who need to be wrangled for group shots, be respectful but decisive. If it’s a more subdued crowd who aren’t eager to have their photo taken, it’s up to you to engage with them and put them at ease.
Either way, remember that you are the only person responsible for getting the required shots so don’t be afraid to assert yourself.
3. Event Photography Gear
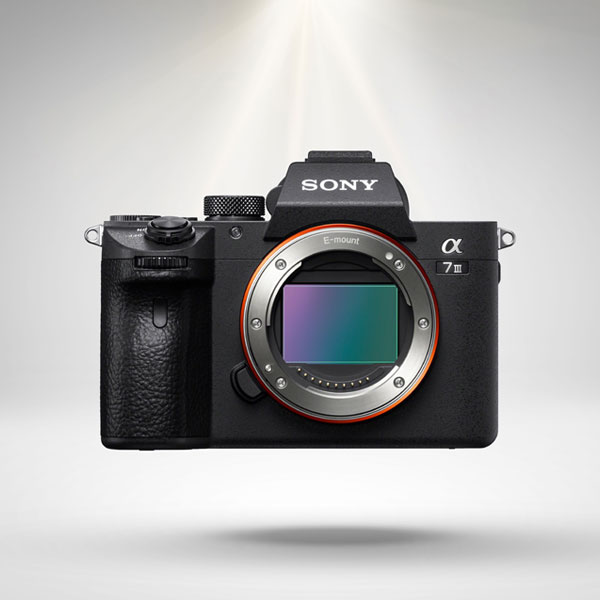
First and foremost, keep in mind that your gear needs to be as quiet as possible so it doesn’t distract from the event; bring a camera that features “silent mode” or “quiet mode” like the Sony a7 III or Canon EOS R.
Sony Alpha a7III Full Frame Mirrorless Camera
Next, consult your list of must-have shots and pack based on your needs. During this time, take stock of the lenses you think you’ll need—don’t show up with one and hope it covers all eventualities. At a minimum, bring two lenses: a 24-70mm and 70-200mm. Ideally, you’ll carry both with you at all times so you don’t have to stop and alternate lenses.
In addition to the items that make the most sense for the gig, bring:
These items are indispensable, so make sure you have extra. If one of them has an issue, the outcome of an entire job can be jeopardized.
Bonus tip: it’s also worth packing snacks and water. Unless you include it in your contract, your client isn’t obligated to provide you with either.
4. Arrival Time
Talk to your client and see if you can get early access to the shooting location. This gives you time to get a sense of the space, plan your photos, and set up your tripod. Remember, you have a specific set of shots that you need to capture so prep accordingly!
Arriving early also gives you the opportunity to take pre-event shots before people rush to the nametag table and buffet. A few close-up, bokeh-centric stills go a long way in capturing the atmosphere of an event.
Yes or no, is it worth getting to the venue a few hours early to prep? Let us know and leave your best event photography tips in the comments below.
The OM-D E-M1X is Olympus’s new flagship camera and unlike a lot of the other Olympus bodies, this one is huge compared to the rest of the Olympus lineup. So why would they stray away from compact performance.
According to the Olympus website, this is “a pro level camera” which explains its beefy grip. But what really sets this model apart from others in its class is what its made of. With a completely redesigned body, this launches a new era of Olympus cameras. Most notably, it has the durability and size sport and outdoor photographers have been praying for.
They’re so confident in this camera’s construction that it comes with a 2-year extended warranty.
So let’s take a peek under the hood.
The OM-D E-M1X comes packed with a 20MP Live MOS sensor and Dual TruePic™ 8 Dual Quad Core Processors. It’s also equipped with up to a whopping 7.5 Shutter Speed Steps Compensation and is a beast in low light. So, I took this camera to Midtown Manhattan to see just how good it is.
The Olympus OM-D E-M1X. With an IPX1 rating, it’s built to withstand the worst imaginable conditions and some real abuse. This is made possible with its deeply placed inputs and weather sealed card door.
Olympus added a high res photo mode which stitches together a series of images to create one massive 50MP file for stunning resolution and detail. Within the camera settings, you have the option to use this mode for tripod and handheld shooting.
After spending a few days with this camera, it’s clear that it’s intended for people who want the feature with none of the baggage.
Photographers who specialize in wildlife, sport, and nature photography finally have a camera that can stand up to tough environments while still having the speed, reliability, and quality needed to get the job done.
The Olympus OM-D E-M1X’s features are so extensive that this can be customized to fit any professional photographer’s needs and style. It also proves that a tiny sensor does not equal tiny results.
Is this the best Micro 4/3 camera thus far? Yes or no. Answer in the comments below and be sure to like and subscribe for more videos.
German camera company Leica today announced the new Leica Q2. This is the latest version of the Leica Q which was first released to critical and public acclaim three years ago. In this post, we compare the original model the new and improved addition to the Q line.
See Leica Q2 specs, features, and product photos. Plus, see how the Q2 compares to the original Leica Q.
The Q2’s sensor is nearly two times better than the first Leica Q (47.3 MP vs 24 MP). The upgraded component has built-in crop elements for equivalent focal lengths of 35mm, 50mm, and the newly available 75mm. In addition to complimenting the Q2’s Summilux lens, the new sensor also maintains a 30 mp image when cropped to a 35mm equivalent frame; that’s significantly more than the original Q’s max of 24 MP at 28mm.
Video Quality
High-quality video recording is a big improvement to the Leica Q2 that the original Q is notably lacking. The Q2 offers 4K with UHD and Cine4K with frame rate options across 4K and 1080p. These specs, in conjunction with the Q2’s FOTOS App and Bluetooth LE, allow users to effortlessly share content with clients, friends, family, and their Instagram followers.
Leica UI Updates
1 of 8
User Interface Updates
The Q2 perpetuates the Leica (and German) tradition of combining streamlined form with function. In this latest iteration, the camera’s body only has a single-stage On/Off switch, a simplified three-button-interface, and programmable button within the thumbwheel dial. That said, a new addition to the layout is a push-button diopter compensation dial on the back of the camera that locks to prevent accidental changes to the user’s settings.
Leica Q2 Accessories
A number of new accessories were released with the Q2 including camera protector cases, straps, and pouches. The ‘Ettas’ line of soft canvas pouches can be used for a number of Leica cameras and will be available in midnight blue, stone gray and red.
Leica Ettas Coated Canvas Pouch Collection
1 of 4
The new leather protector cases are specifically for the Q2 and feature a leather carry strap and lens cutout. The cases fit snuggly around your camera and are available in black, brown, pink, and red. Finally, the camera straps. This add-on is as clean and classic as the cameras they’re made to hold. This accessory is made specifically for the Q2 and is available in black, brown, pink, and red. Please note that while these items are pictured together, the cases and straps are sold separately.
Leica Leather Q2 Camera Protectors
1 of 5
That concludes our first look at the Leica Q2 specs, features, and photos. Leave your thoughts on this new camera in the comments below.
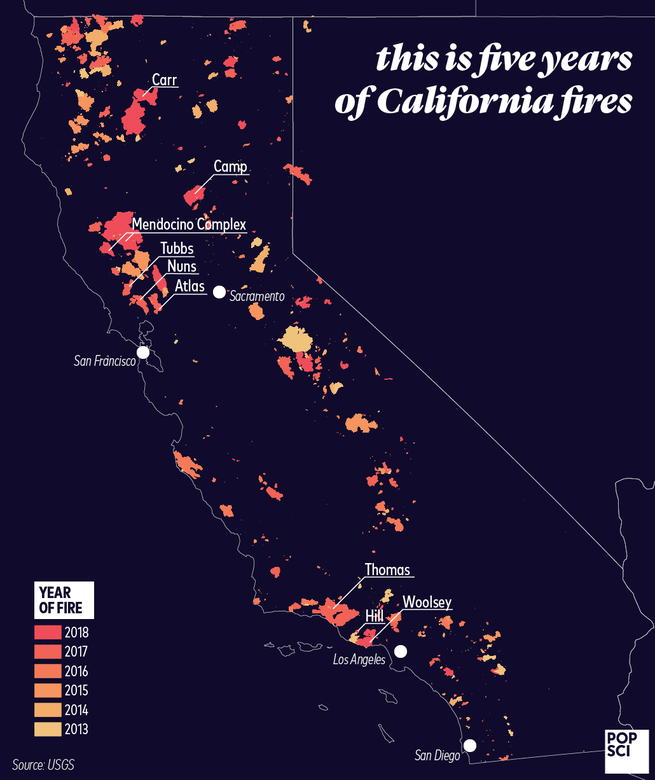
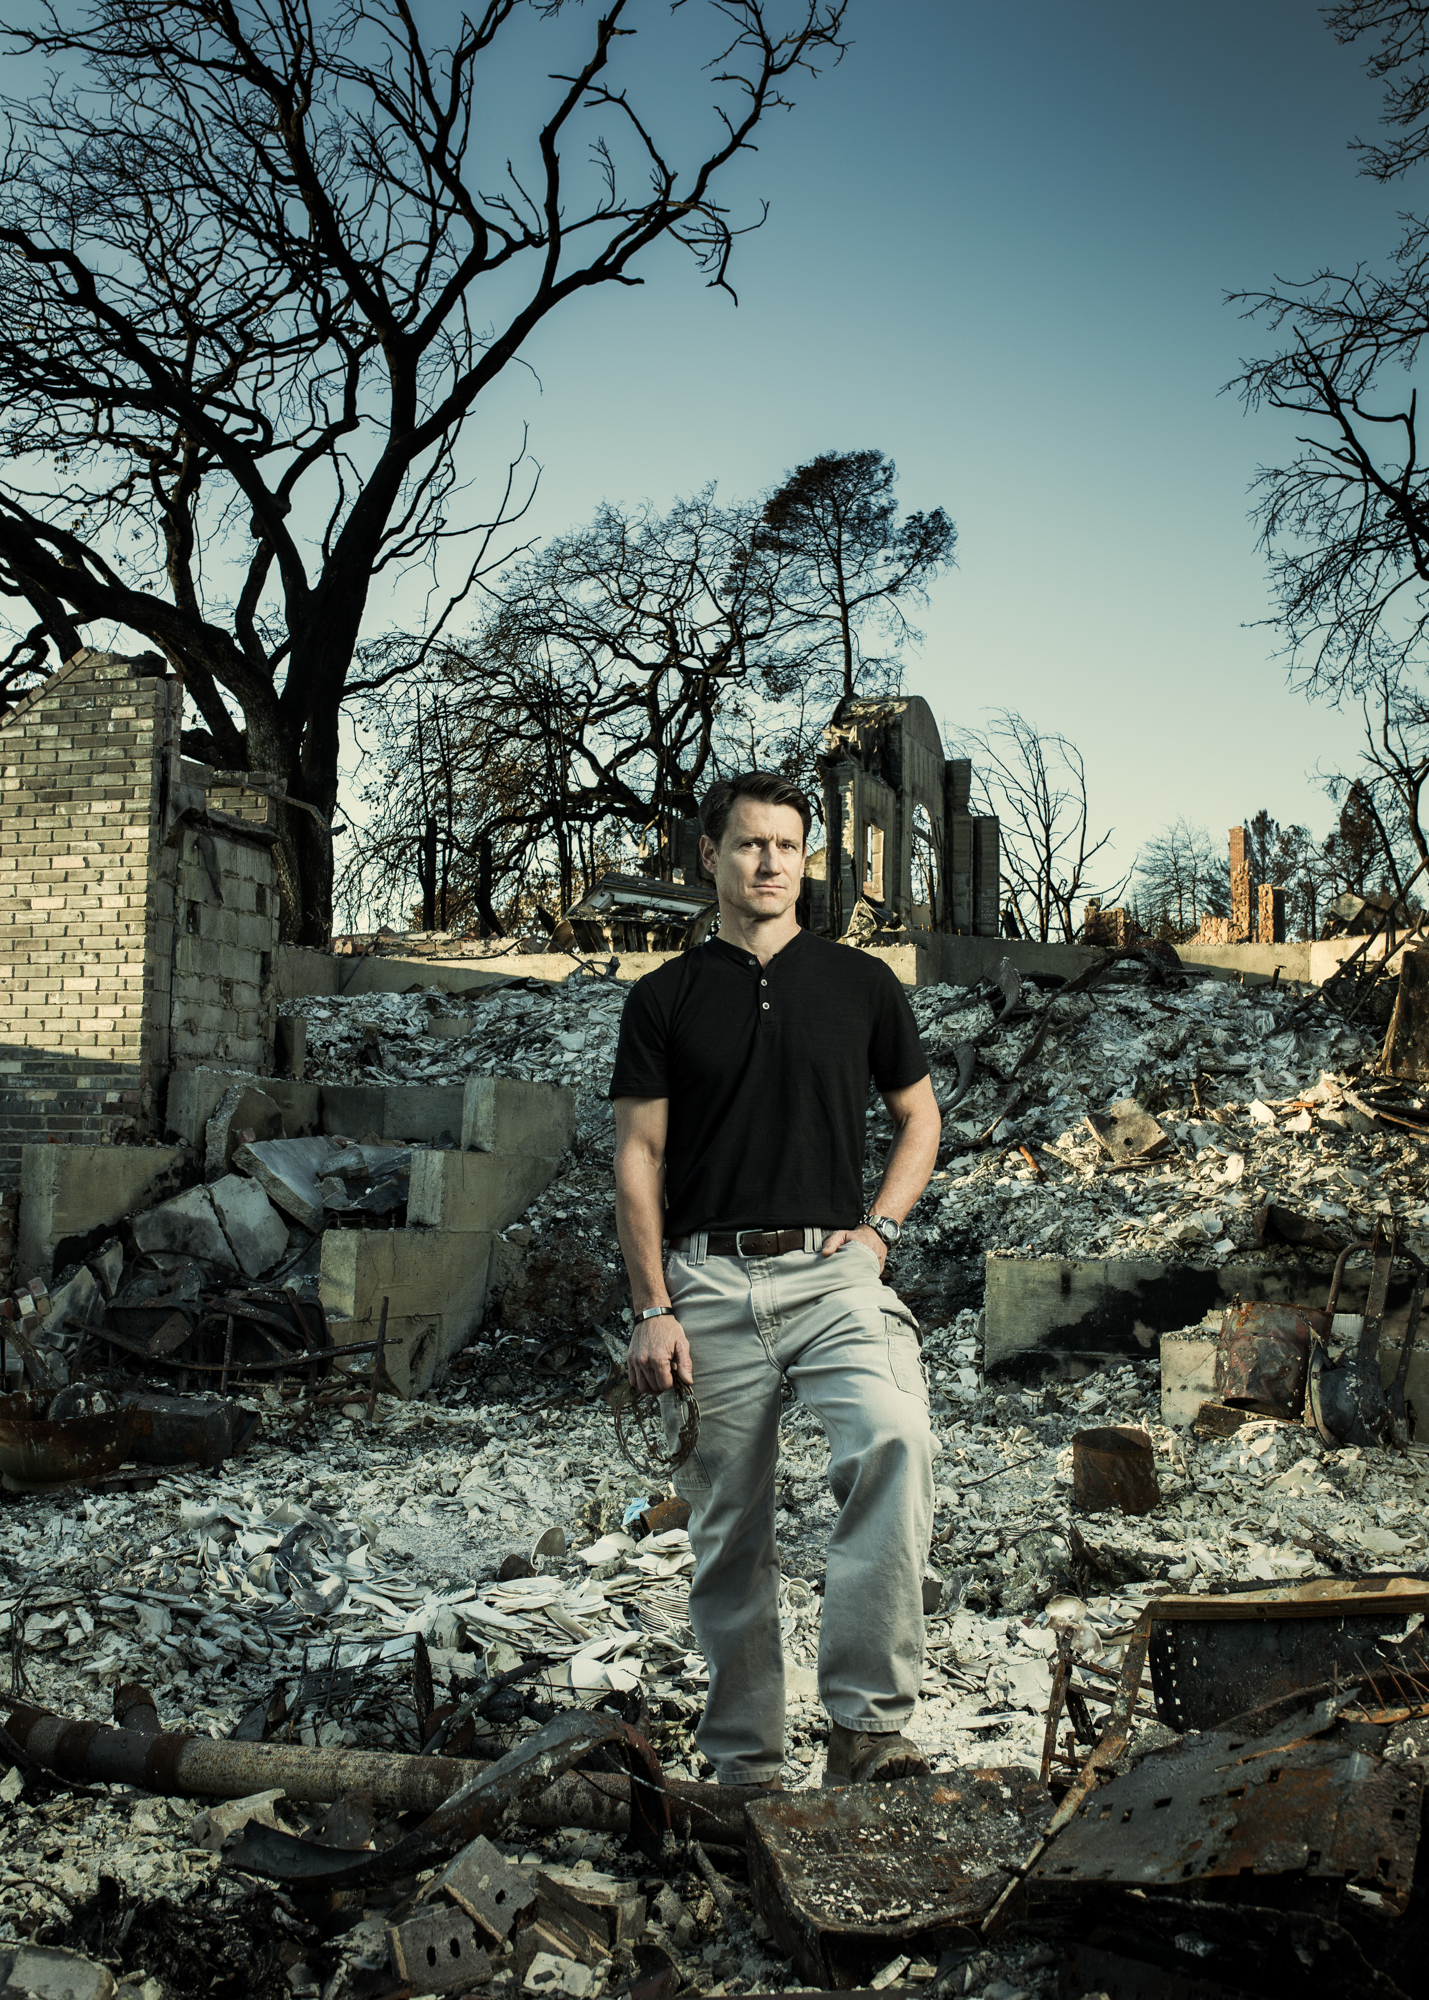
The scale of the recent California wildfires is hard to comprehend. Over the past two years, they’ve displaced tens of thousands, destroyed nearly 24,000 homes, and scorched more than 3 million acres.
Now, take a moment and try to imagine what 3 million acres of burnt land looks like.
Unless you’ve seen it, I’m not sure that you can; the number is so large that it feels abstract. Similarly, discussing 24,000 destroyed homes facilitates a sense of detachment to the families who lived there. Sweeping tragedy lends itself to dehumanization.
Considering a body of people that large peels away the humanity of those involved. Victims are no longer individuals who lost their photo albums, pets, and sense of security. Instead, they are a data point in a series of statistics and a fleeting news story from nearly two years ago.
So, how do we unpack an event of this scale? How do we redirect our focus to the individuals affected and their ongoing needs? We turn to those who make sense of the ideas our society struggles to process: artists.
Enter photographer Roman Cho.
Courtesy of Popular Science
Defining Influence
Roman went to school for music before switching to photography. He started out taking “typical live music shots” for his friends’ bands then graduated to actors and politicians. He was inherently interested in portraits and figures who influence our culture. In his words, “anybody who was interested in making a difference or making a change in our society.”
His quest to capture people with sway put him in touch with a wide array of celebrated comedians, actors, and athletes. However, his search for influencers soon had him looking outside of the spotlight.
“It’s not just famous people,” he chuckled amiably. “I also find excitement in photographing people who I describe as ‘unseen hands’ who make a difference but are not quite well known or—by choice—are behind the scenes.” Roman’s photography is his way of pointing to the shadows and saying, “no, no, no, this person needs to be paid attention to because what they’re doing is changing the way we approach the education system, or they’re changing the type of food we eat through their work and we just don’t know it.”
This unique focus is one of the key factors that drew him to the aftermath of the Santa Rosa, California wildfires.
Ashes Fell Like Snow
Roman Cho’s involvement documenting the October 2017 Northern California wildfires is the textbook definition of fate. His project, Ashes Fell Like Snow, began with a chance encounter.
He met a man named Dan and his wife in 2016 ago at a food conference in San Francisco. “We really hit off and Dan [said] I live up in Healdsburg,” an area about an hour and a half north of San Francisco in Sonoma County. “I have a nice place up there. Come on up after the conference is over, just hang out for a day.”
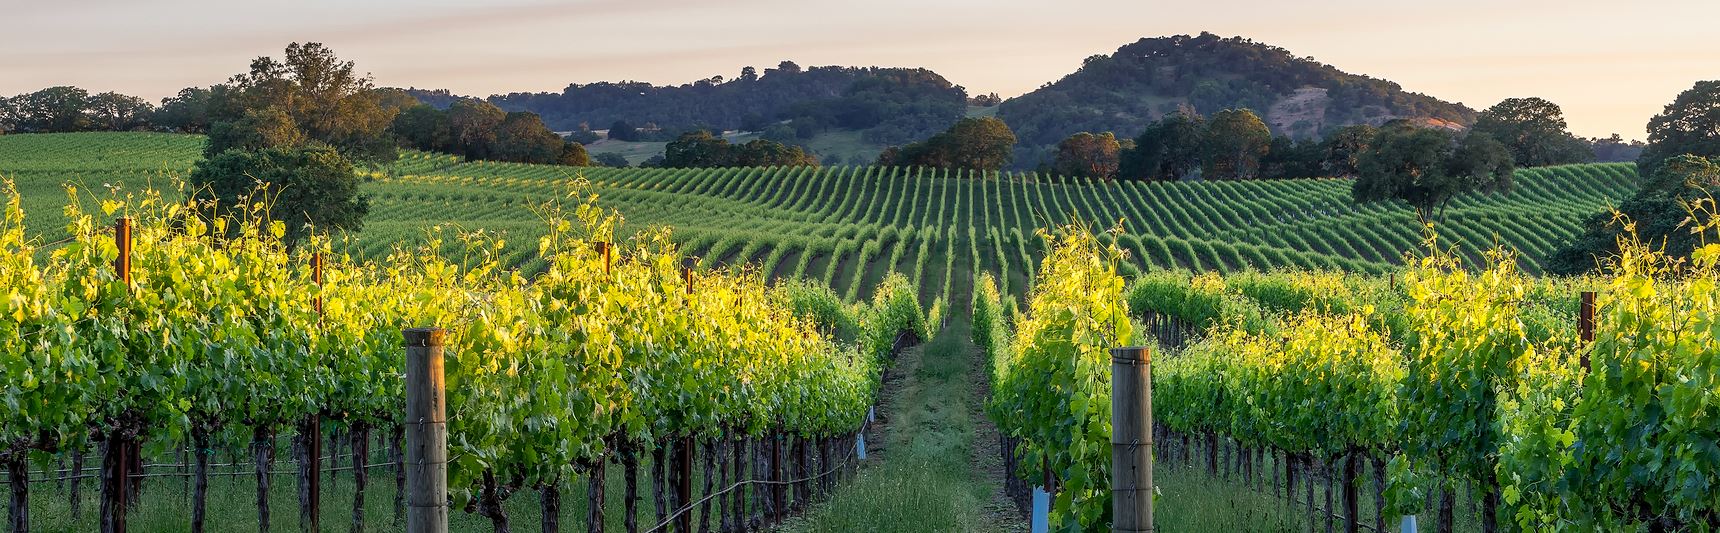
Healdsburg | Courtesy of healdsburg.ca.us
Roman took him up on his offer. “Healdsburg is basically wine country,” he recounted. It’s a small, quiet town that bears no resemblance to the congested city of Los Angeles where Roman lives. “[Dan] introduced me to some of his friends some of who live in Tularosa which is fifteen miles south of Healdsburg. I would go there like two, three times a year and that’s how I got to know [the area].”
Roman, an avid cyclist, was in town for Levi’s 2017 GranFondo—a well-known bike race held in Sonoma County. “So, me and my buddy, we went, we rode 100 miles, we had fun, then we came back [to Los Angeles]. A week later the town was on fire,” even during this interview, years later, his voice still held echos of disbelief.
“The town that I loved visiting and hanging out—that has some of my friends up there—is burning. The community center where we would have the after party for the ride is now an evacuation center.”
An Outpouring of Support
Roman, now fully invested in the Sonoma County community, checked in on his friends via Facebook. In real time he witnessed the outpouring of community outreach in Santa Rosa. Everyone was doing what they could to help those affected from starting clothing drives to organizing food banks.
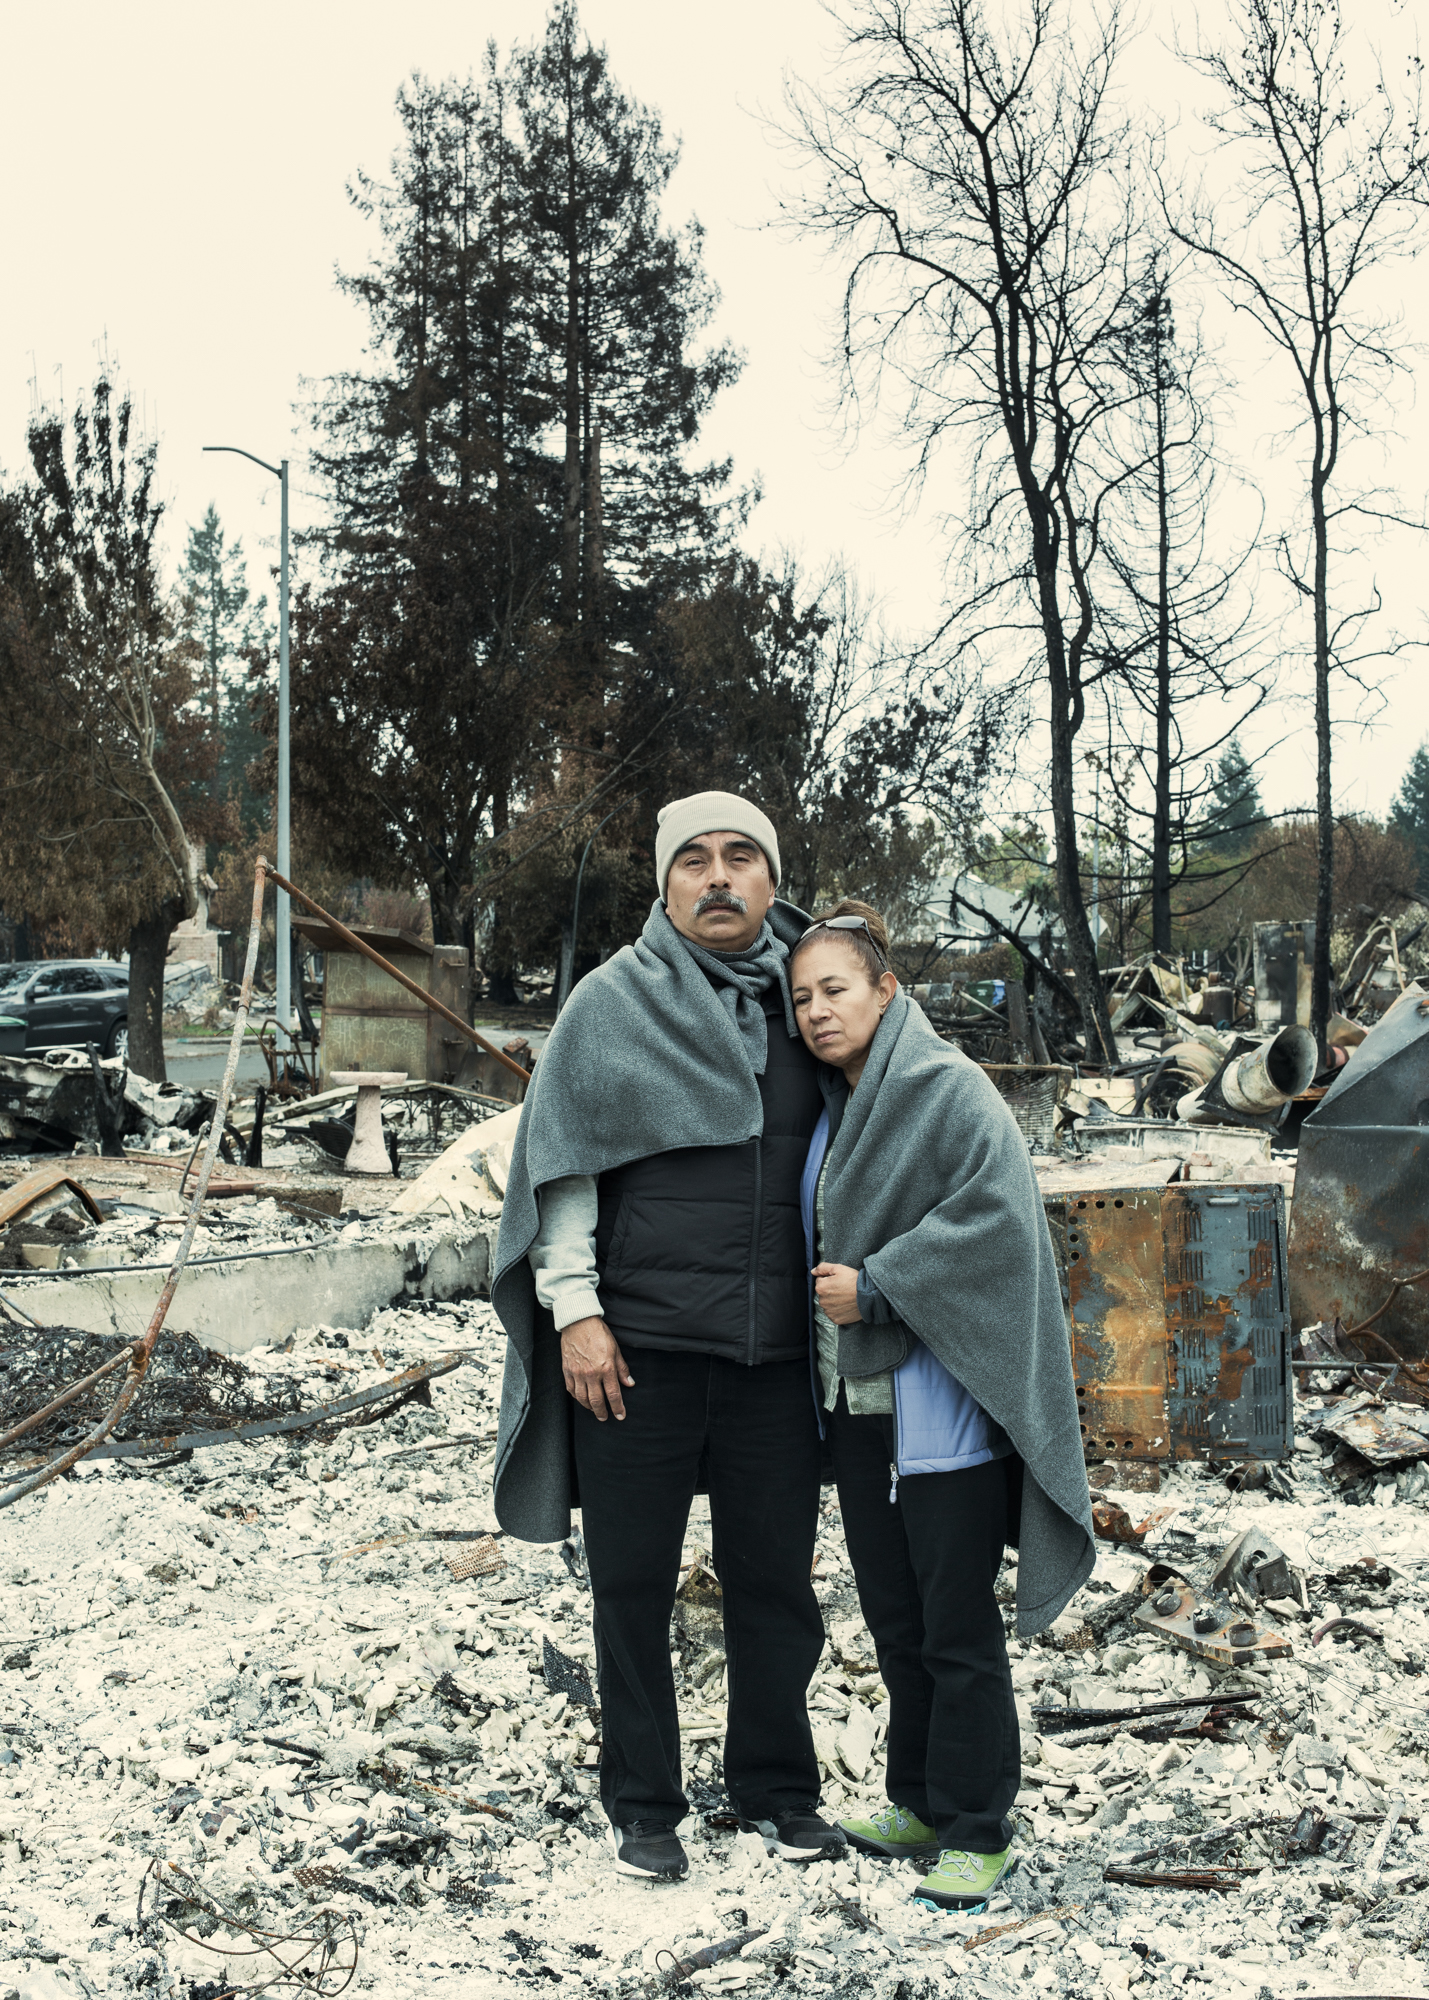
Juan and Florentina | Courtesy of Roman Cho
“People were reaching out saying I have a room that’s available if anybody needs it and I was thinking, that is remarkable. There are some things that I don’t know if I would see in L.A. like this degree of community support.”
He was touched by what he saw and wanted to help. “I’m a starving artist working for myself. I don’t have a whole lot of money to contribute to this. So I thought, well, the real way I could help and contribute is to photograph these people, [record] their stories and help spread them to the general public.”
“When your house burns down and you lose everything, literally everything, except the shirt that you were wearing at the time [of the fire], you don’t bounce back from that in an instant. And [this is a] community where 5,000 homes have burnt down. They’re looking at five to ten years of recovery. So I thought these people need more in-depth, thorough attention on them and what they’re going through.”
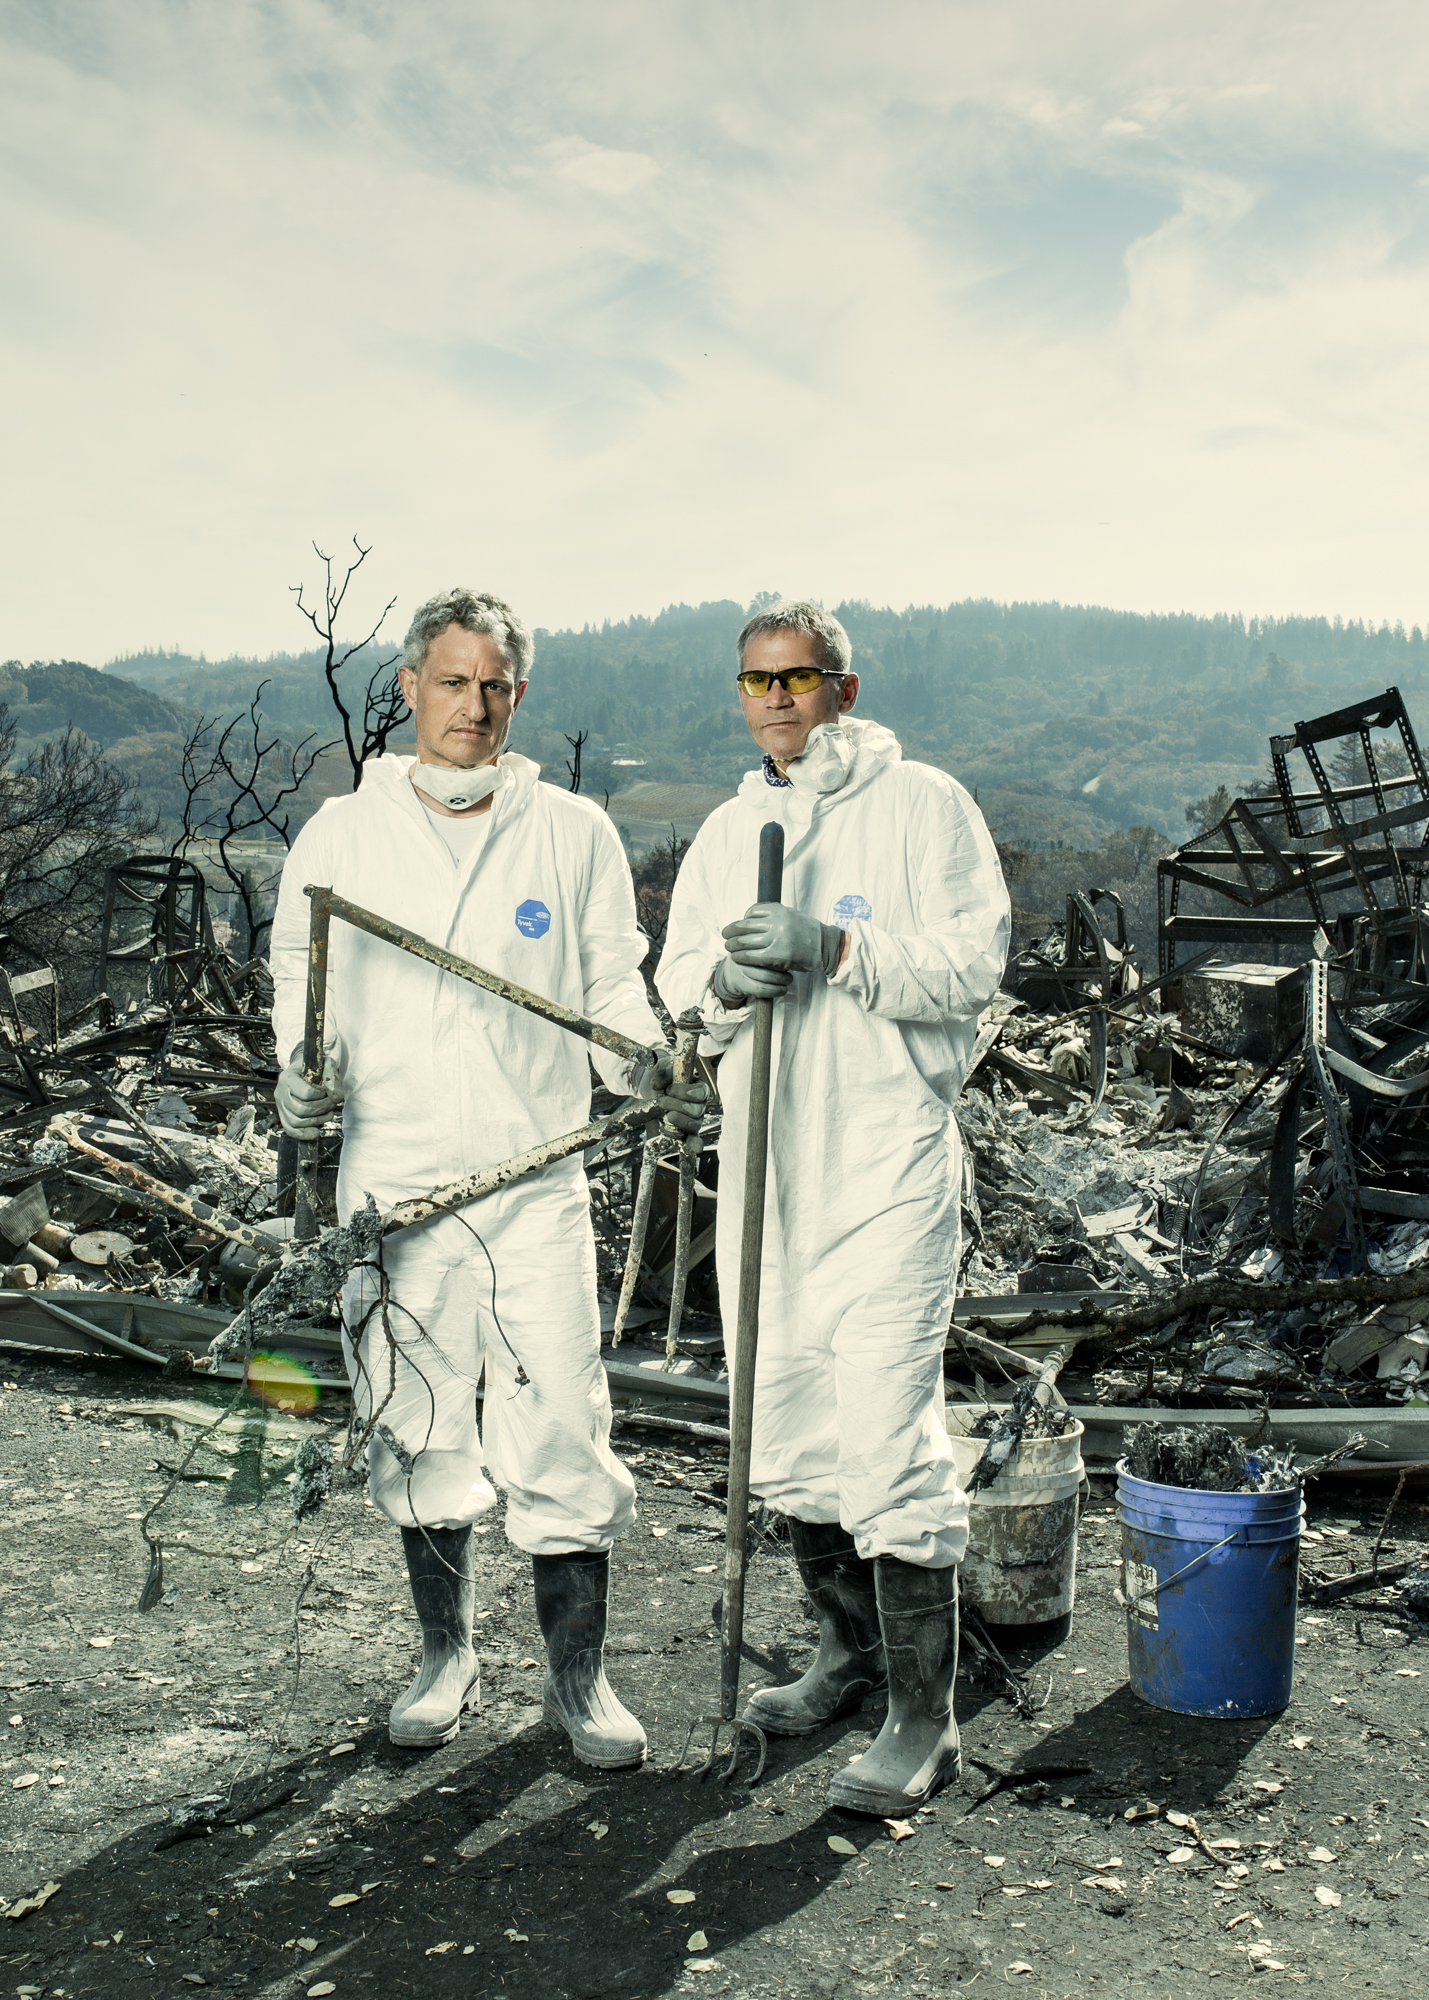
Walt Flom | Courtesy of Roman Cho
He didn’t take this task lightly; Roman went into it with the understanding that he had to give himself entirely to the project. “I said, well, if I’m going to do this and if I’m going to be bothering these people who lost everything and have been really traumatized, I can’t half-ass it. I really have to give 100%. I have to really push myself.”
Determined to help and armed with his Canon 5D Mark iii and Sigma Art lenses, Roman made his way to Santa Rosa.
Access
“When I was driving up from L.A., it was about two weeks after the initial wave of the fire,” Roman mused. “I only had like four people that I reached through email who agreed to be photographed at that point. And I was kind of weary and nervous…I only have four people, I’m driving up 300 miles—am I wasting my time?”
He only had a few close connections in the area. Once he exhausted those, he reached out to friends of friends and cold pitched people on Facebook.
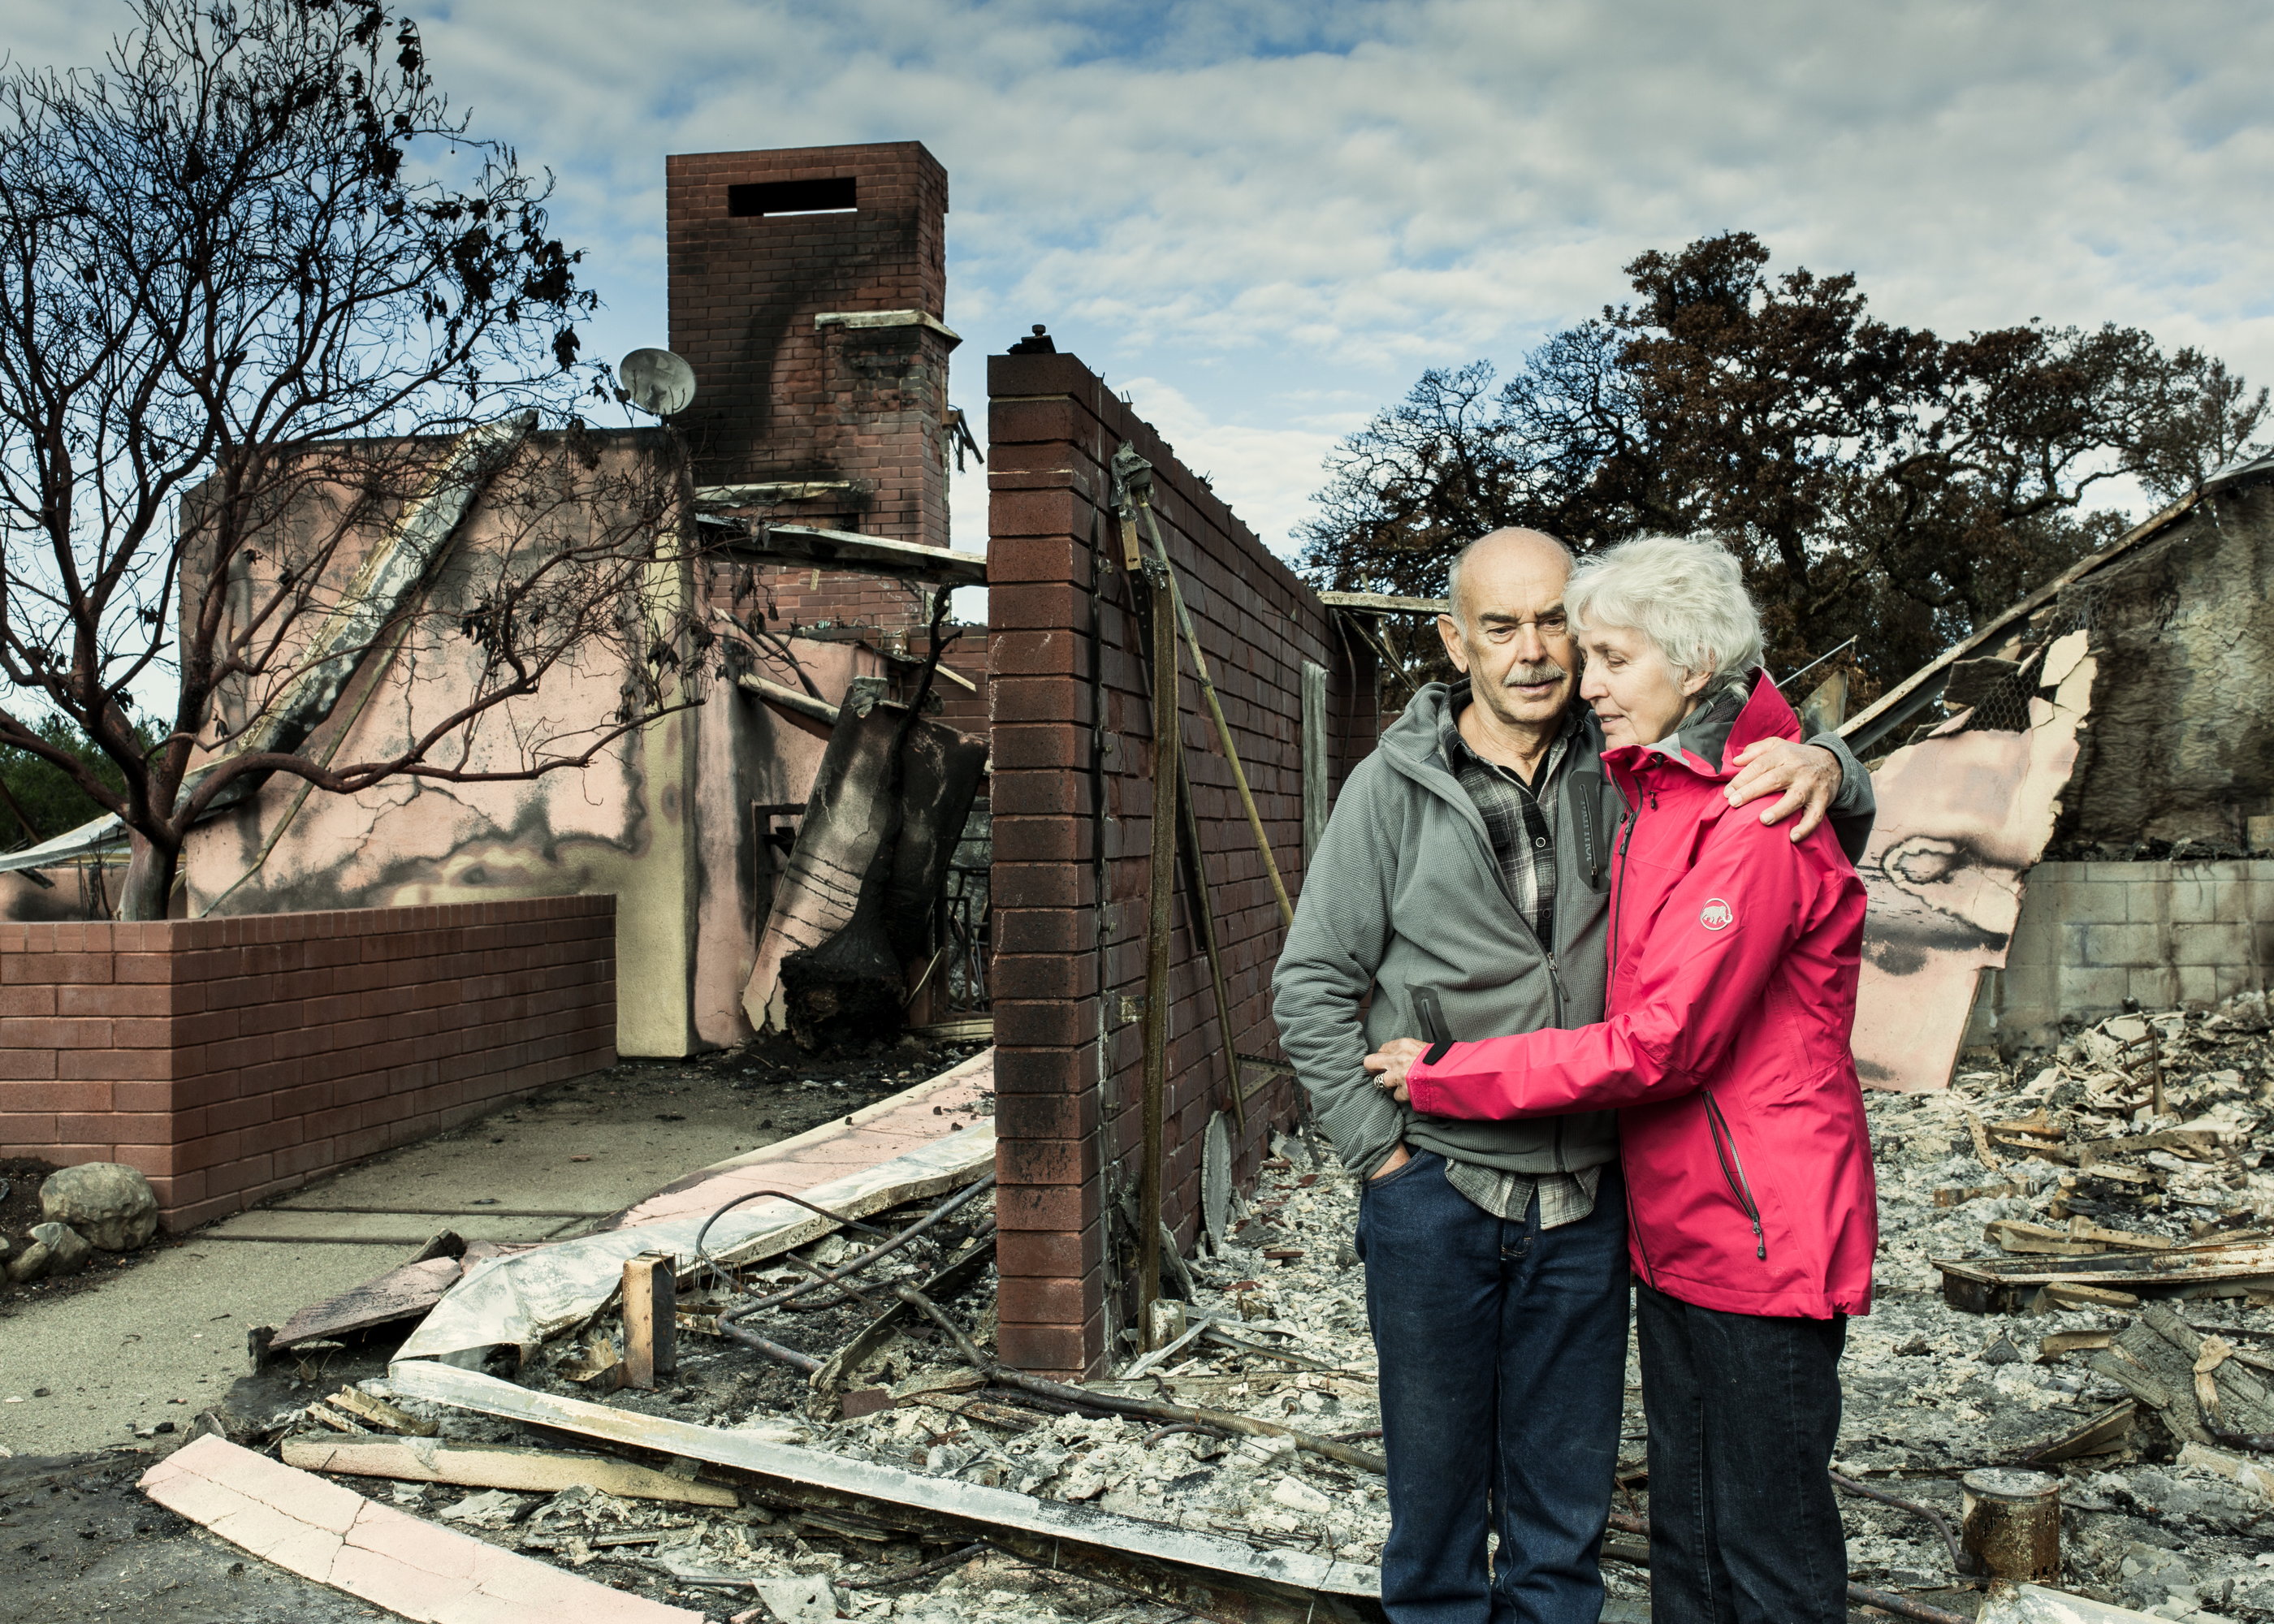
Johann and Gloria Heinzl | Courtesy of Roman Cho
Roman’s most pressing fear was how the community would react to his presence. Would they be hostile? Defensive? It had only been fourteen days since their lives burnt to the ground—was it too soon to come in with a camera and ask for their stories?
But when he finally arrived to start his interviews, he faced an additional challenge he wasn’t expecting: finding his subjects.
“I was driving blind, through Google Maps because the thing that you may not realize…is once you get to the neighborhoods, it’s not just the houses that are burnt down. The street signs have been burnt down. [Google Maps says] turn left at some land and you have to trust that this is it.”
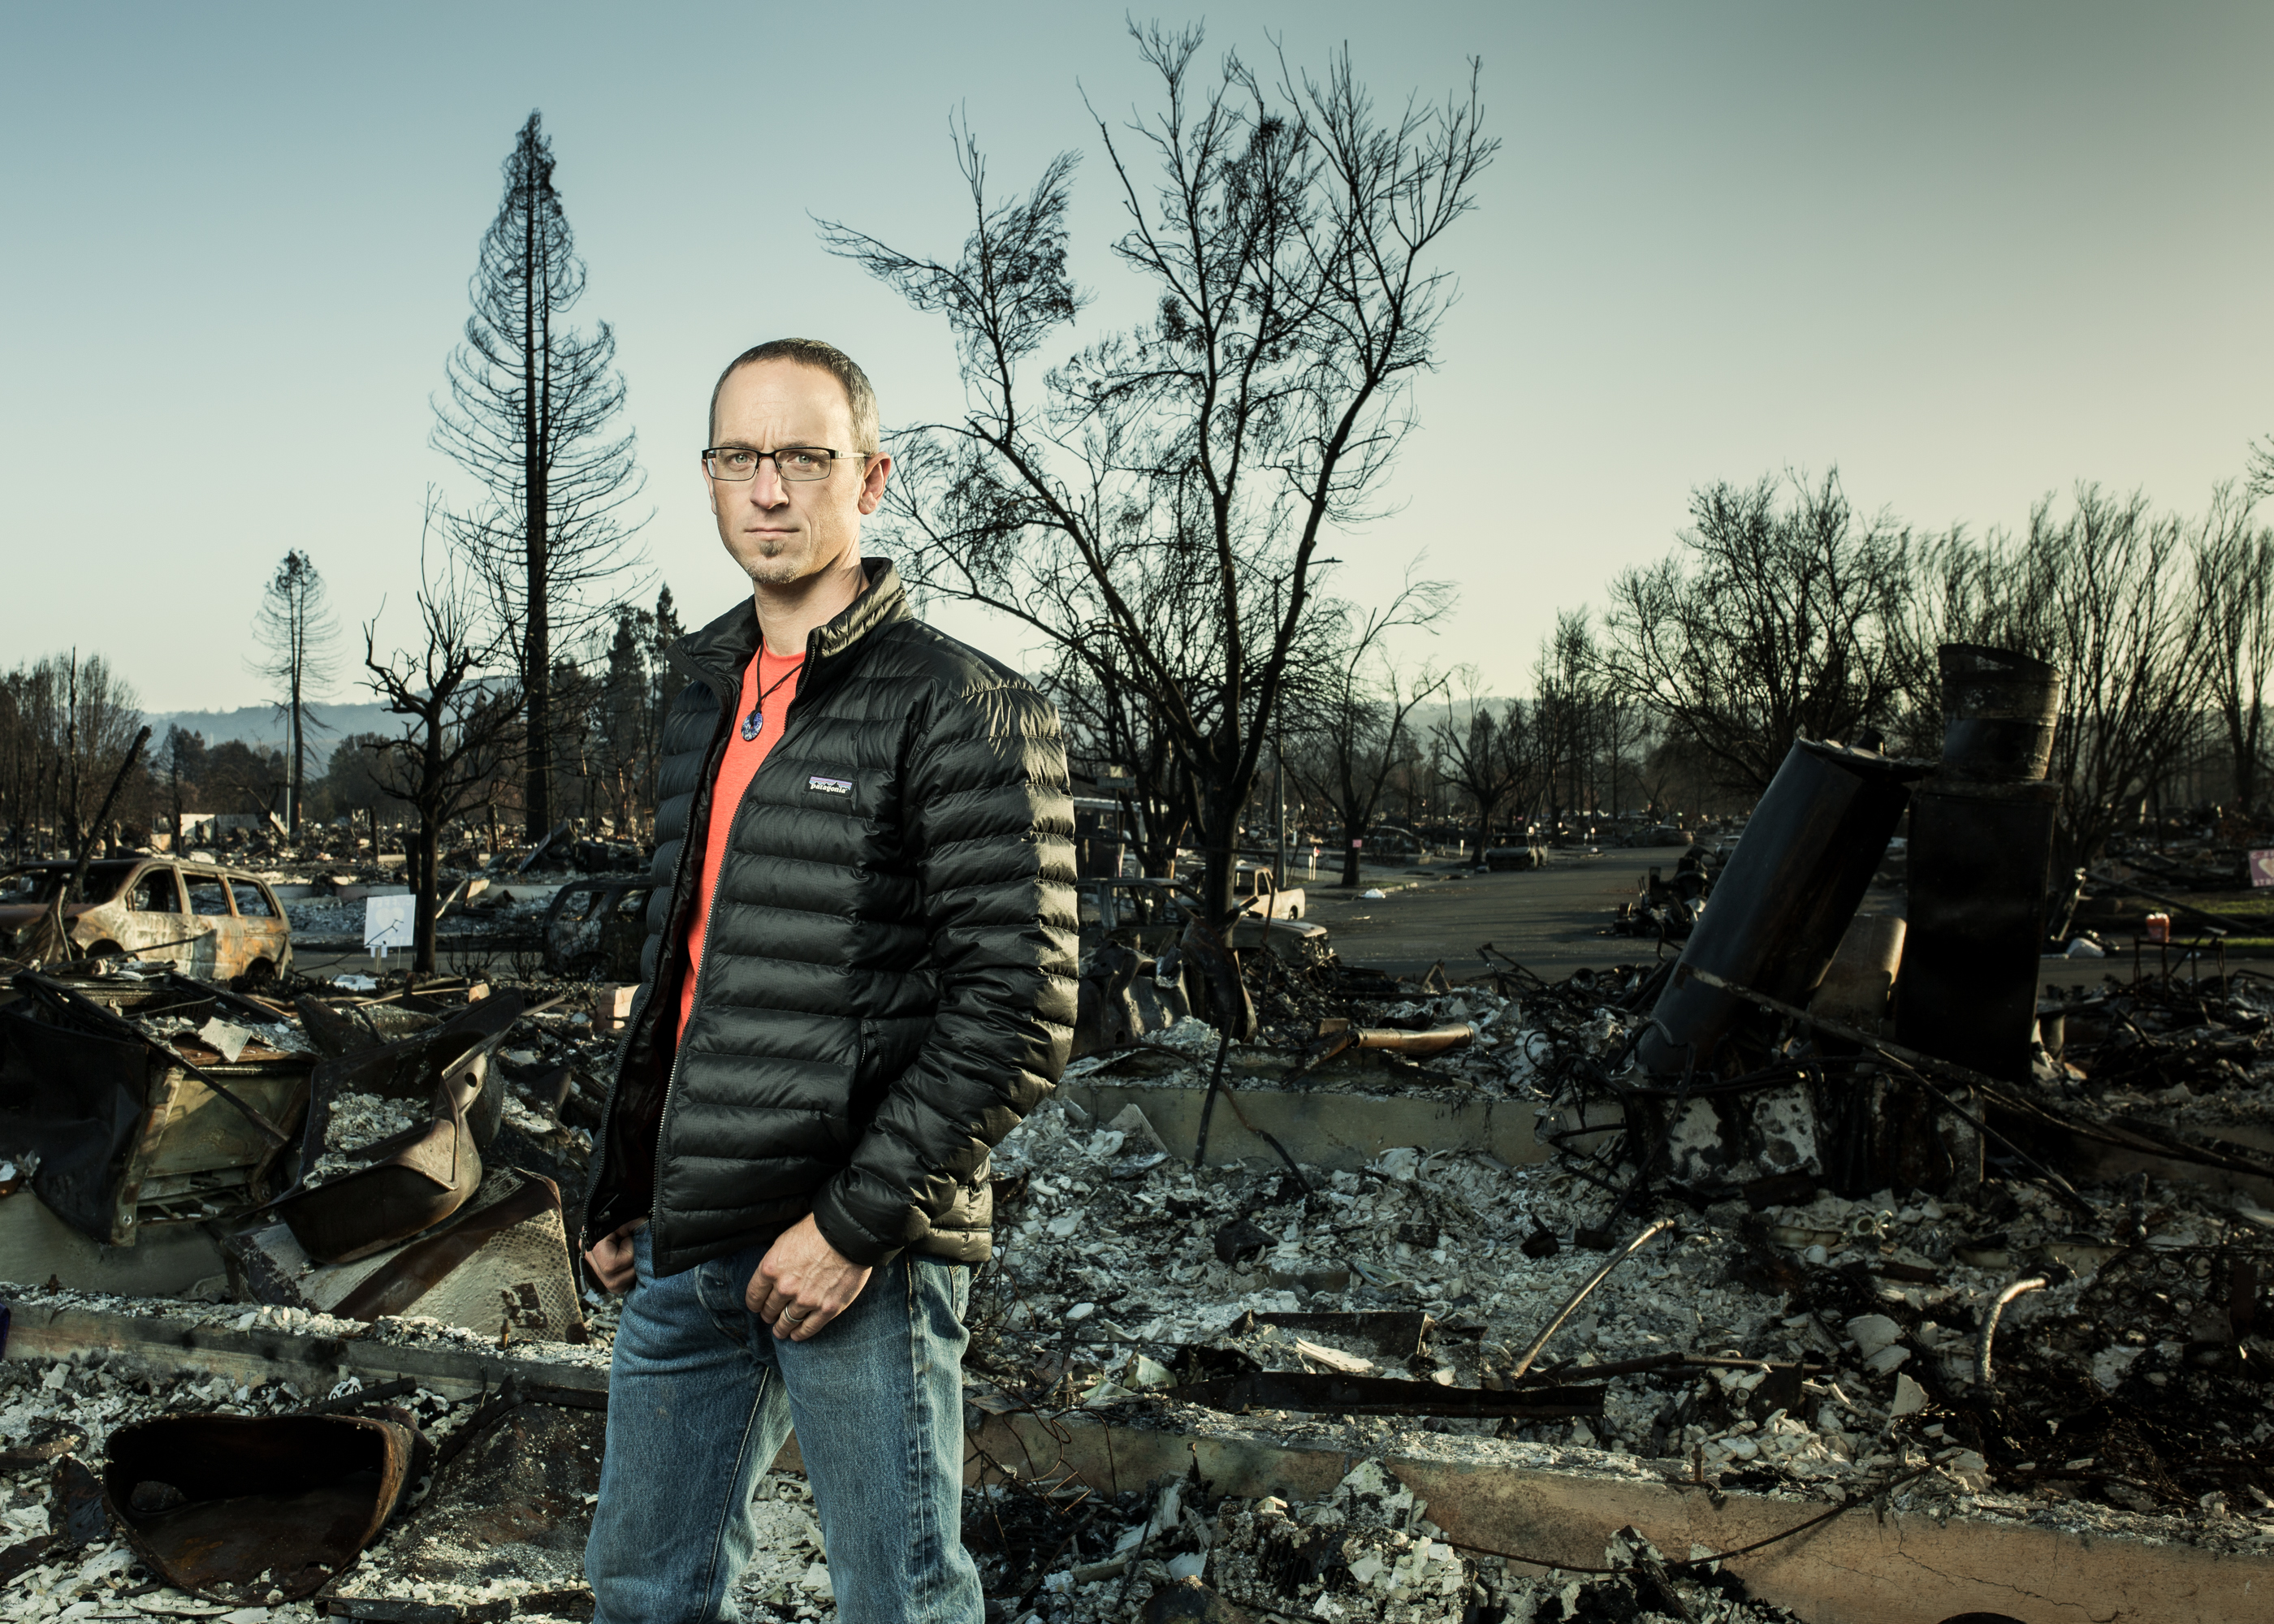
Jeremiah Kahmoson | Courtesy of Roman Cho
The First Interviews
One of the first people Roman interviewed was Todd Witzenberg. Todd agreed to meet Roman at his wife’s parents’ home then drive them both up to where his house once stood. The men met and before they got in the car, Todd pressed Roman on the purpose of the series.
“So I meet [Todd] where I said I’d meet him. He says, now okay, what is this for? And I explained why I’m doing this: the media is going to go away after the initial wave. The community is going to be forgotten, but the community may need help for the next five, ten years. I’m photographing and interviewing people to help keep the awareness going.”
Todd said OK and they left to take his photo. It wasn’t until months later that Todd told Roman that, initially, he wasn’t at all interested in being photographed and interviewed. In fact, it was only when he heard Roman explain his reasoning that he was compelled to follow through with his promise; it was obvious that the photographer was coming from the right place.
Todd Weitzenberg | Courtesy of Roman Cho
A combination of timing, motivation, and luck that made Roman’s project a success. A different artist with a self-serving purpose would have been rejected. However, Cho wasn’t there for himself. He was there to serve the community and his honesty inspired honesty from his subjects.
“Once I started photographing people…they weren’t really holding anything back. They were really revealing and quite open and at a certain point, it seemed therapeutic that they were relieving themselves of the burdens that they had experienced and… trying to get an understanding of what they experienced by talking about it,” he said earnestly. “I realized the best thing I can do is just shut up, listen and be there for them.”
An Expanding Community
Word-of-mouth endorsements for Roman’s work soon had his shooting schedule chock full.
“[During] the initial round, I ended up talking to 50 people and did a series of 30 photo shoots over the course of eleven days,” Roman rattled off. “It was kind of nuts. I counted it at one point and [my] average was about three photo shoots a day. The most I ever had was five photo shoots in a day.”
The journey was worth it, but not without personal cost. “I was up there for two weeks photographing people and I came back and I was emotionally just drained, physically and emotionally just drained.”
October 2018 Installation
1 of 4
Courtesy of Roman Cho
Courtesy of Roman Cho
Courtesy of Roman Cho
Courtesy of Roman Cho
In December 2018, Roman returned to Santa Rosa to mount a three-week public exhibition of Ashes Fell Like Snow. While there, he photographed more people, added to the story, and caught up with his first subjects.
“Right now,” he said, “I would like to continue and to follow up to see how these people are coming along in the next two and the next five years.” While Roman plans to continue his work, the extent of the project depends on how much he’ll be able to afford out-of-pocket.
“In a community of about 100,000 people, 5,500 residential homes were burnt down. So on the one hand, photographing 50 people in eleven days is quite a lot. But when you look at the bigger picture, it’s a drop in the bucket.”
Future Projects
As Roman decompresses from Ashes, he’s also gearing up for his next project: Culineria. His next portrait series focuses on the people (of course, behind the scenes) making important changes regarding sustainability in the food industry.
“It’s a project that I’ve been working on for the past seven years, so now I’ve got to focus on putting together a book proposal. So that’s my big focus for the next several months if not the year.”
As Roman Cho continues putting the spotlight on those who most deserve it, we will keep listening, watching, and learning. Keep an eye out for updates on both of Roman’s projects and be sure to leave any questions or comments in the section below.