Home Blog Page 16

Fujifilm X-S10 Review | A Powerful, Lightweight Crop Sensor Camera

The recently announced Fujifilm X-S10 is an exciting release. The mirrorless crop sensor camera is the latest addition to Fujifilm’s X series, and offers remarkable performance capabilities given it’s small, lightweight frame. Although the camera shares traits with many of the other X series cameras, there are multiple features that differentiate the X-S10 from its siblings. To kick-off our Fujifilm X-S10 review, let’s take a look at the camera’s build. 

Fujifilm X-S10
The Fujifilm X-S10’s large hand grip and unique dial and button design differs it from other X series cameras.

Build

Portability is a recurring characteristic across Fujifilm’s X series, and the X-S10 is no different. The camera weighs just 465 grams (14.6 oz) when loaded with a battery and memory card.  That’s pretty impressive considering the X-S10 also has a larger grip than other cameras in the series. The deep, magnesium alloy grip means the camera is easier to handle when shooting handheld or with a large lens.

In fact, stability appears to have been a design priority for the X-S10. In addition to the larger grip, the camera has a 5-axis in-body image stabilization mechanism that uses a motion sensor to deliver up to 6 stops of compensation. 

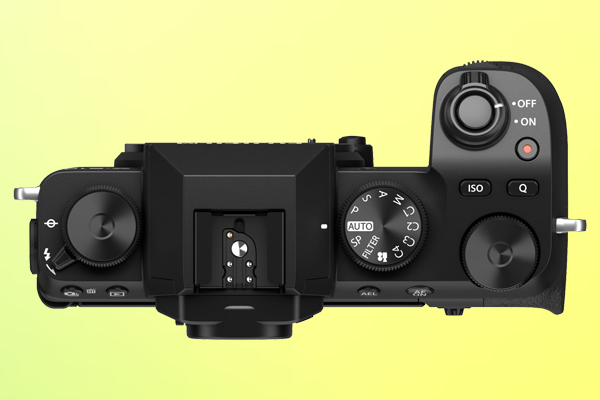
Fujifilm has also redesigned the layout of buttons and dials for the X-S10. Unlike the X-T4, X-T30, and most other X series cameras, the X-S10 mode dial includes Auto and PASM modes. That is, Program, Aperture Priority, Shutter Priority, and Manual modes. While these modes are standard on all DSLR and mirrorless cameras released by other brands, Fujifilm cameras typically don’t include them. 

The updated mode dial on the X-S10 also includes 4 customizable modes that can be assigned to specific image quality, focus, and shooting settings.  Other new additions to the top of the camera include dedicated buttons for ISO and video recording, which can also be customized to control other settings.  

The mostly metal construction of the X-S10 feels strong and durable, although it has no weather sealing. The camera also has a 180° vari-angle touch screen, and uses a NP-W126S lithium-ion battery for power. The camera’s single memory slot fits UHS-I SD cards.   

The X-S10 has an excellent build, and while it may not look or feel quite like the other X series cameras, it does perform like one. 

Performance 

The Fujifilm X-S10 is equipped with a back-illuminated 26.1MP X-Trans CMOS 4 sensor and a quad-core X-Processor 4. The same sensor and image processor as the X-T30, X-T3, and X-T4.  With these mechanics, the X-S10 delivers impressive image quality and is capable of 20fps uncropped continuous shooting, or 30fps with a 1.25x crop.

Producing images that look like they were taken by a film camera is a hallmark of the Fujifilm X series. The X-S10 has a total of 18 film simulation modes that are designed to mimic the color reproduction of various types of photographic film. The result is that the X-S10 can deliver stunning visuals using an array of different color tones.

Additionally, the X-S10 has great autofocus. The hybrid system is very fast, capable of focusing in just 0.02 seconds. Face and eye detection functionality is available, as well as Tracking AF for moving subjects.  The autofocus also works remarkably well in low-light. When fitted with the Fujifilm XF 50mm F1 R WR lens, the X-S10 can accurately focus in near-dark conditions (-7EV). 

The X-S10 has impressive video recording capabilities as well. The camera can record 4K 30p 4:2:0 8-bit video internally, or 4:2:2 10-bit video via HDMI output. The X-S10 can also record slow-motion (240fps) in full HD. 

While the build of the X-S10 is fairly unique, the camera uses the same mechanics as several other X series cameras to produce a powerful yet familiar performance. 

Competitors

To round-out our Fujifilm X-S10 review, let’s see how the camera compares to its competitors. The pre-order price of the X-S10 (body only) is $999, or $1,499.95 with a 16-80mm kit lens. Within the X series, this places the camera at the same price point as the X-T3, right between the X-T30 ($799) and the X-T4 ($1699).  

As mentioned, all four cameras have the same sensor and image processor. However, only the X-T4 and X-S10 have in-body image stabilization. The mechanism is also 30% smaller in the X-S10, allowing the camera to be lighter than both the X-T3 and X-T4, even with a larger grip. The X-T30 is lighter and lower-priced, yet lacks the in-body image stabilization, large grip, and simple dial and button design of the X-S10. Its LCD screen also only tilts rather than fully articulating like on the X-S10. 

Outside of the X series, the X-S10’s competitors include the Nikon Z 50 and the Sony a6600. The Nikon Z 50 has a lighter build, and is more affordable at just $856.95. However, it’s arguably less powerful. The Z 50 has a lower resolution sensor, no in-body image stabilization, and only goes up to 11fps of continuous shooting, versus 20fps on the X-S10.

Meanwhile, the Sony a6600 is  heavier and more expensive at $1,398. While it does offer in-body image stabilization, like the Nikon Z 50 it only goes up to 11fps of continuous shooting. Unlike the Z 50, the a6600 can output 30p 4:2:2 8-bit video via HDMI. The X-S10, however, can output 10-bit video via HDMI. The major advantage of the Sony a6600 is it’s 720 shot battery life. That’s over twice as long as both the Fujifilm X-S10 (325 shots) and the Nikon Z 50 (300 shots). 

Overall Value

Concluding our Fujifilm X-S10 review, it’s fair to say the camera offers great overall value. The X-S10’s light, ergonomic build contains sophisticated mechanics that allow it to perform comparably to significantly more expensive cameras. In other words, it’s high quality and low cost. The X-S10 is an excellent addition to the Fujifilm X series and the increasingly competitive mirrorless camera market. 

The Best Lighting for Outdoor Photography

The best lighting for outdoor photography depends heavily on where, when, and what you’re shooting. Different styles of photography require different equipment and techniques to achieve optimal lighting. This is especially true when you’re outside, and at the mercy of your surroundings. 

When shooting inside, you can more easily control the light, shadow, background, and other factors that make up your mise-en-scene, a cinematography term referring to everything that’s in frame (or has an impact on what’s in frame). Controlling these elements is decidedly more difficult the moment you step outside. 

Despite the challenges, outdoor photography can also be very rewarding. You can’t photograph picturesque scenery or wild animals inside a studio.  Shooting outside also allows you to take advantage of natural light. Below, we’ve compiled some outdoor photography tips for lighting, broken down by style, so that you can adequately prepare for your next outdoor shoot.

Landscape Photography

San Diego Sunrise by Frank McKennaWhile it can be fickle, natural light can also be used to great effect in landscape photography. Once you start observing and understanding how sunlight is impacted by the time of day, weather, and your surroundings, you will start to learn how you can manipulate it to achieve your desired results.

The golden hour is generally considered the best time of day for outdoor photography. More specifically, this refers to the hour immediately following sunrise, or the last hour before sunset. 

In the middle of the day sunlight is brighter and more direct, creating harsh shadows. During the golden hour, when the sun is closer to the horizon, the light it emanates is more diluted by the atmosphere. This results in softer, reddish light that is ideal for capturing visually pleasing photos. In fact, you’ll likely observe an array of different hues as the sun either sets or rises. This provides an opportunity to capture unique, colorful imagery.  

Of course, you don’t have to wait for the golden hour to capture a great landscape photo. Sometimes, shooting in the middle of the day matches your creative goals. You can utilize harsh shadows to produce fascinating visuals. Alternatively, you can find ways to filter the light so it’s less intense. In a rainforest, sunrays filtering through the trees can look ethereal. You could also use a lens filter. For example, a neutral density filter will evenly remove the amount of light entering your lens, relieving pressure on the dynamic range of your camera. 

On overcast or rainy days, the natural light will have a different impact on your photos. Even in the middle of the day, the light will be softer, with blue tones instead of red. If you’re planning to use natural light, you need to plan ahead. Check the weather predictions in the days leading up to your shoot. If you want warm, bright photos, it doesn’t make sense to go shooting on a day with poor weather. That’s not to say you can’t capture great landscape photos on an overcast or rainy day. Ultimately, it depends on your creative vision. Natural light can be unpredictable, but if you know what you want, planning ahead will help you achieve your vision. 

Outdoor Portrait Photography

Portrait by Warren WongThe golden hour can be a good time for outdoor portraits as well, however, you need to be well prepared. Timing is of essence when it comes to natural light, especially during the golden hour when the light can dramatically change within the span of several minutes. It will be difficult to take multiple portraits with a consistent look and feel as the light will be constantly changing.

Shooting portraits in the middle of the day, you have to be mindful of the amount of light entering your lens. On a bright, sunny day, the light will create harsh shadows and can wash-out the skin tone of your subject. It’s recommended that you move the subject to a shaded area, or in a position where no hard light is hitting their face.

Another issue you’ll likely encounter is an overexposed background. Fill flash is a technique you can use to correct this issue. It will require the use of a camera flash. The flash built-in to your camera may work, however if you find yourself taking a lot of portraits, it’s probably worth investing in a more powerful external flash.

First, adjust the ISO and aperture on your camera so that the background of your shot is exposed correctly. This will make your subject dark, but that’s okay. When you take the photo, the flash is going to illuminate your subject without impacting the background, resulting in an evenly exposed photograph. To get the perfect exposure, you may have to adjust the settings on your flash or camera, or change the distance between you and your subject. You want the subject’s face to be well-lit, but not so bright that it’s obvious you used a flash.  

You can also use a light meter to calculate what camera settings you should use for an optimal exposure. While most cameras have a built-in light meter, they’re less reliable. They measure reflected light, which is the amount of light that’s reflecting off your subject. Alternatively, an external incident light meter will measure how much light is falling on your subject. Holding the meter near their face and facing it towards the light source, it will tell you the exact camera settings to use for a good exposure of your subject. You can even use the meter in conjunction with a flash. 

Macro Photography

Bumblebee photo by Boris SmokrovicMacro photography is a popular outdoor photography style. It involves taking extreme close-up photos of just about anything, although often the subject is an insect, flower, or naturally-occurring texture. Good macro photographs are often vividly colored, capturing an otherwise small subject in intricate detail. 

Photographing anything on such a small scale means that lighting is paramount. Depending on your lens and camera, the sun will often provide enough light to adequately light your shot. In fact, like the other styles, on a bright day there may be too much natural light. If your subject isn’t mobile, you may need to wait until they’re in the shade or the sun is behind a cloud before taking your photograph. Overcast days can be great for macro photography when the natural light is softer. 

If you find that you don’t have enough light, you may need to use a flash. You shouldn’t use the built-in camera flash.  You’ll likely be very close to your subject, and these flashes aren’t designed to work in close proximity. Use an external flash if you can, and hold it to the side of the camera, further away from your subject. Like with an outdoor portrait, you’re trying to introduce fill flash. That is, enough light to fill in the shadows and properly expose your subject without making it obvious you used a flash.

If you’re photographing an insect, a bright flash may scare them away. If you only need a little more light, you might get away with just using a reflector. A silver reflector, held beneath your subject in the light, will allow you to add more reflected natural light into the shot. 

Summary

While there are other styles, generally speaking the best lighting for outdoor photography is natural light. However, the time of day, weather, and your camera settings can be critical to ensuring your photos turn out great. You may also wish to invest in some outdoor photography equipment such as an external flash, light meter, or reflector.

While we hope the tips above will help you, the best way to master outdoor photography lighting is to take your camera outside and start experimenting. Pay attention to how natural light changes throughout the day, and how you can use your camera settings and accessories to your advantage. Golden hour or not, there’s always something interesting to photograph outdoors.

Sony FE 12-24mm f/2.8 Lens Review

Sony’s 12-24mm f/2.8 from the Premium Master G Series is a fantastic ultra-wide-angle lens option for photographers in architecture and landscape photography. Designed for full-frame, APS-C and Super-35 cameras, the lens is versatile for capturing both stills and video.  Here’s our Sony FE 12-24mm f/2.8 lens review.

Lens Specs for Sony’s 12-24mm f/2.8

This wide-angle lens features a fast, nine-blade f/2.8 maximum aperture. Featuring an ultra-wide 12-24mm focal range, the versatility in this ultra wide-angle zoom allows photographers to stray from prime lenses. The lens, like its predecessors, is dust and moisture resistant, which is crucial for many nature and outdoor photographers.

The front of the lens is somewhat bulky, requiring 150mm filters. However, it still has a relatively compact size for a wide-angle lens. Weighing 29.9 oz (847g), this Master Lens is more portable than many wide-angle zoom alternatives. It also features an integral, non-removable lens hood to control flare. This lens additionally includes a rear filter slot, an alternative to using the front end.

Sony F3 12-24mm f/2.8 Lens

Build Quality of the Sony FE 12-24mm f/2.8 Lens

Though pricier than its competitors, like the Sigma Art 14-24mm f/2.8, the image quality and build of the lens may justify the price tag. Anti-reflective Nano AR Coating II on the surface of the lens helps suppress internal reflections and minimize flare. This helps the lens produce sharp, clear imagery. Even when shooting in low-light situations, the lens is designed to retain high clarity throughout the image.

Chromatic aberrations are minimized by a floating focus mechanism, dividing the focus group of the lens into two independently controllable groups. This is exceptionally effective in minimizing the aberration that may come with varying focusing distances. The floating focus mechanism allows the Sony 12-24mm f/2.8 lens to produce outstanding sharpness at any distance.

How Sharp is the Sony 12-24mm f/2.8 lens?

With a minimum focusing distance of 0.92 ft (0.28m), the Sony 12-24mm f/2.8 gets up close and personal. This Sony lens gives minimal distortion acting as a macro lens, and for wider scenes distortion is negligible if any. The overall performance of this zoom lens through all apertures and focal lengths is superb.

The sweet spot of this Sony FE 12-24mm f/2.8 is between f/8 and f/11, with a loss of sharpness only becoming noticeable at f/22. Any noticeable vignetting takes place at f/2.8, while no longer visible at f/4 and beyond.

An Overall Review of the Sony FE 12-24mm Lens

A compact and versatile lens, this new addition to Sony’s Premium Master G Series has received praise from photographers and filmmakers alike. With the incredible optical design, the Sony 12-24mm f 2.8 lens brings another excellent piece into the Sony full-frame E-mount family. While the price tag may be higher than other super wide-angle lenses, the quality of the Sony 12-24mm Master G Series lens is worth it based on build alone.

When & How to Use Aperture Priority Mode

Aperture priority mode is an underrated camera feature. Standard on any digital camera with a mode dial, it’s often abbreviated as Av or just A.  Many photographers opt to use it as their default mode selection. We’ve broken down when, why, and how to use aperture priority mode below, but first – what is it? 

Photo by Tom the Photographer

Simply put, your camera will automatically adjust the shutter speed when aperture priority is enabled. You will still be able to manually control aperture, ISO, and all other settings. As you adjust the aperture, the camera will choose an optimal shutter speed to match your selection based on the amount of light it detects coming through the lens. 

For example, imagine you’re taking a photograph in a dark room and you want to use a low aperture. Let’s say you change the aperture from F8 to F4. Your camera’s light meter will indicate there is now less light entering the lens.  If aperture priority mode is enabled, your camera will automatically decrease the shutter speed to allow for a better exposure. 

How to Use Aperture Priority

The dial on top of your camera allows you to select the mode. Twist the dial so that A or Av is selected to enable aperture priority mode. Once you’re in this mode, the camera will assume control of the shutter speed and you’ll no longer be able to adjust it manually. 

Shutter priority, also known as time value (S or Tv on the mode dial), does the reverse. It automatically changes the aperture, and allows you to manually adjust the shutter speed.  Program (P) mode allows the camera to adjust both aperture and shutter speed. This differs from automatic (Auto) mode which typically controls both in addition to ISO, exposure compensation, white balance, and flash. Some cameras also have an automatic ISO feature. It’s usually separate from the mode dial so that it can be used in conjunction with aperture or shutter priority, or program mode.

Why Use Aperture Priority 

The key benefit of this mode is that it gives you manual command over critical settings, while still allowing you to benefit from your camera’s automatic capabilities. In short, it saves you time. Many great photographs were captured in spontaneity; there’s not always time to manually adjust every setting. Shooting in aperture priority mode allows you to worry about one less setting while retaining creative control over the look and feel of your photos. 

Beginners specifically should consider using this mode. While manual mode provides full control over your camera, the number of settings that need your attention can be intimidating. Shooting in aperture priority mode (especially with automatic ISO) allows you to focus on mastering the aperture, a crucial element of photography. 

When to Use Aperture Priority

Photo by Daniele Cuevas
Aperture priority mode works great in landscape photography | Photo by Daniela Cuevas

Aperture, shutter speed, and ISO are three of the most critical settings on your camera. Together they make up what is called the exposure triangle, as they directly influence the amount of light exposed to your camera’s sensor (or film), resulting in a photograph. Each element has a different effect on the captured imagery.

In most shooting scenarios, aperture and ISO will have a more pronounced visual impact on the resulting imagery. Aperture influences the depth of the field, while ISO controls the sensitivity of your camera’s sensor to light. The wrong aperture could mean your subject is out of focus, while an ISO that’s too high will add grain to your photos. Aperture priority is a great mode to have selected by default, as it allows you to manually control these critical settings, while the camera automatically optimizes your shutter speed. 

More specifically, aperture priority mode works great in landscape and portrait photography. In these styles, sharp, grain-free imagery is paramount, and the shutter speed can cause minimal disruption. 

Aperture Priority vs Shutter Priority

There is plenty of debate in the photography community about aperture priority vs shutter priority. Some photographers refuse to use these modes altogether, preferring manual (M) control over all camera settings. However, the best mode to use ultimately comes down to a combination of what you’re photographing and personal preference. 

As mentioned above, aperture priority is a great mode to use for landscape and portrait photography. However, it’s not the best option for every shoot. 

When photographing a moving object, the shutter speed will have a big impact on how that motion is captured in the resulting exposure. Therefore, shutter priority makes more sense. It allows you to manually control the shutter speed, and choose how much motion blur (the movement of the object) is captured within your photograph. Manually choosing a longer shutter speed in order to capture more motion blur within a single photo can result in really interesting visuals.  This technique is called long exposure photography

Summary

Contrary to popular belief, always using manual mode is not the sign of a professional photographer. A true pro knows the full capabilities of their camera, and how to use them to their advantage. Many photographers use aperture priority mode because it allows them to utilize the automatic power of their camera without sacrificing creative control. Timing is essential in photography, and aperture priority mode saves time. Sounds like a pro move to me.

Nikon Announces 2nd Gen Z Series | Nikon Z 7II and Z 6II

Overnight Nikon announced the next generation of their Z series of cameras. The Z 7 and Z 6 were an excellent debut by Nikon into the full-frame mirrorless camera market back in late 2018. The release of these new cameras promises to be just as exciting, with the specs indicating that Nikon have made a concerted effort to address the biggest issues that were raised with the first generation.  Let’s take a look at the Nikon Z 7II and Z 6II

Table of Contents

Z 6 II

Nikon Z 6II
Courtesy of Nikon

One big change Nikon has implemented for the second iteration of both Z series cameras is to double up on some of their important core features.  Both the Z 6II and Z 7II have 2 image processors and 2 memory card slots. 

With 2 EXPEED 6 image processors, the Z 6II is a much faster camera than the Z 6. The Z6II has quicker image processing and a buffer capacity 3.5 times larger than the Z 6. Dual processors have also helped increase the high-speed shooting capabilities of the camera. The Z 6II can handle 14fps continuous shooting at full resolution, up from 12fps on the Z 6.

Like the first generation, the Z 6II is remarkably well suited to both photography and video. The camera can record 4K UHD 30p video with full pixel readout, with a firmware update promised in February 2021 that will allow 4K UHD video recording at 60p. Additionally, when outputting to an external recorder like the Atomos Ninja V, you can record 10-bit N-log or HDR (HLG) video. A firmware upgrade is available (for purchase) that allows you to output 12-bit ProRes Raw via HDMI to a compatible external recorder.

As with the Z 6, the Z 6II is compatible with Nikkor Z lenses, but can also use F-mount lenses with the FTZ adapter. However, the ability to reverse the direction of the focus ring on Z lenses so it matches non-Nikon lenses adds a nice touch. Although a Z lens is still required to achieve 5-axis image stabilization (3-axis with other lenses). 

Other updates include additional autofocus options, such as improved eye-detection AF, and compatibility with the new MB-N11 battery pack that allows for comfortable vertical shooting and nearly doubles battery performance. 

Z 7II

Nikon Z 7II
Courtesy of Nikon

One of the biggest complaints about the first generation of the Z series was that both cameras only had a single CFexpress/QFD memory card slot. The addition of a second slot for UHS-II SD cards on the Z 6II and Z 7II is a massive win. Whether you enjoy the additional recording space, or like to dual record for peace of mind, two memory slots has become the standard for full-frame cameras of this calibre.

While both cameras have dual EXPEED 6 image processors, only the Z 6 II can reach 14fps of continuous shooting at full resolution. The Z 7II only goes up to 10fps, up from 9fps on the Z 7. Other than this, the Z 7II tends to have all the same new features as the Z 6 II, including the ability to record 4K UHD video at 60p and additional autofocus options.  

Like their predecessors, the key difference between the Z6 II and Z7II is their sensors. The Z 7II has Nikon’s highest resolution sensor, a 45.7MP BSI CMOS sensor with no optical low-pass filter. This translates to richer, higher quality imagery, but also means larger file sizes. The Z 7II also has a 493-point Hybrid AF versus the 273-point AF on the Z 6II, though this is directly related to the difference in sensor size between the two cameras. 

Summary

The key upgrades in both the Nikon Z 7II and Z 6II are the dual EXPEED 6 image processors and the dual memory card slots. Having 2 processors drastically enhances the performance potential of both cameras, while 2 two card slots are a direct response to consumer demand. Other improvements such as additional autofocus options help the 2nd generation cameras stand out as true upgrades. 

Panasonic Announces LUMIX BGH1 – A Mirrorless Box Camera

Today, Panasonic announced the release of their latest camera, the Lumix BGH1, and it’s a major callback to vintage movie cameras. Promising cinematic 4K video capabilities housed within a small, lightweight build, the BGH1 is targeted at content creators looking for a portable camera that still packs a punch. 

The Lumix BGH1 is a box camera, a square-shaped design that was used for film cameras made in the late 19th and early 20th century. However, the shape is the only thing that’s old about this camera. Like the first box camera released in 1888, the BGH1 uses state-of-the-art technology to deliver a remarkable performance. 

Lumix BGH1 Mirrorless Box Camera 
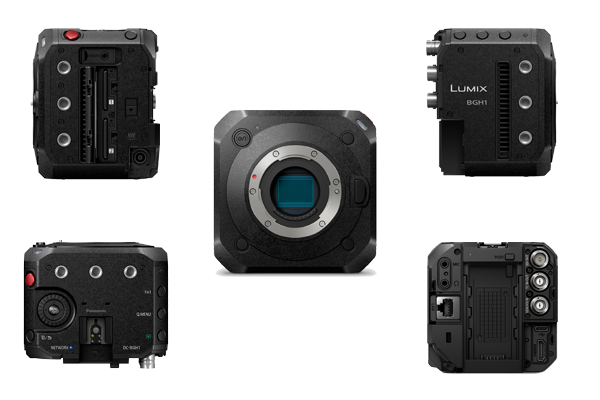
What We Know So Far About the Lumix BGH1

Equipped with a 10.2MP Four Thirds Live MOS sensor and a powerful Venus engine, the BGH1 can record 10-bit Cinema 4K 60p video internally. This goes up to 4:2:2 10-bit C4K 60p video when recording externally via the camera’s HDMI port, or 4:2:2 full HD 60p via the 3G-SDI port. The BGH1 can also handle continuous video recording thanks to a built-in fan in its heat dispersion structure, and has 2 memory slots for SD cards.  Pre-installed with V-Log L, the BGH1 has 13 stops of dynamic range. Coupled with the camera’s dual native ISO, the camera should work reliably well in low-light. 

So far, that sounds pretty impressive for a camera that weighs just over a pound (545g). The BGH1’S small build means it’s also perfect for use with drones or gimbals. Mounting holes on multiple sides of the body will make it easy to securely mount the camera or attach accessories. Unfortunately, one downside of the small build is that the camera doesn’t have an electronic viewfinder or LCD display screen.

The BGH1 has been optimized for remote control. You can connect the camera to your computer via ethernet or USB and use Panasonic’s Lumix Tether software to stream and control the camera. In fact, the software can be used to remotely control up to 12 BGH1 cameras from the same computer. If you’re using an ethernet connection, the camera’s PoE+ feature allows you to power the camera through the ethernet cable. The BGH1 can also be wirelessly controlled using Wi-Fi or Bluetooth via the Lumix Sync app

Who Should Buy it 

The BGH1 is a powerful, portable video camera, perfect for creators that plan to broadcast or live stream their content.  Given the focus on video performance, this camera is not the best choice for photographers. The absence of an LCD screen and viewfinder may be also be a dealbreaker for some. Despite this, the BGH1 has everything you need to produce cinematic content, whether you’re using a multicam setup or capturing aerial footage with a drone.

The 5 Best Lenses for the Sony a7s III

Since its release in July, the Sony a7S III has proven to be one of 2020’s most popular cameras. When comparing it with the a7s II, we declared it worthy of the hype it’s attracted, citing a powerful full-frame sensor and remarkable 4K video capabilities. However, a camera is only as good as the lenses you use it with. Here’s a roundup of the 5 best lenses for the Sony a7s III

Leading third-party lens brands have made a concerted effort to release high quality lenses to pair with the powerful, full-frame mirrorless cameras that are now on the market. Sony a7S III shooters certainly have plenty of e-mount lenses to choose from. Despite the plethora of options, we’ve identified five specific lenses that we think will help you get the most out of your camera. 

Without further ado, here are our picks for the 5 best lenses for the Sony a7S III. 

Sony 16-35mm F2.8 GM

Sony 16-35mm F2.8 GM All photographers and videographers should have a wide-angle lens in their camera bag. If you’re shooting with a Sony a7S III, the Sony FE 16-35mm F2.8 GM lens is a great choice. 

The Sony 16-35mm is a well-built lens. The metallic body has strong weather sealing, and ring movement is smooth and precise. There’s an AF/MF switch on the side of the lens, along with a focus hold button that can be assigned to other functions via the camera

Internally, the lens has a first-rate construction. Two XA (extreme aspherical) elements minimize distortion and field curvature, which can sometimes occur with wide-angle lenses. They also complement the lens’ wide aperture and 11-blade diaphragm to produce smooth, beautiful bokeh. The lens has two DDSSM systems as well, which help it achieve sharp focus quickly and quietly. This is particularly helpful if you’re shooting video and need the autofocus to work continually without making any noise. 

Sony’s G Master lenses tend to be pricey, and the 16-35mm is no exception. A more affordable alternative is the Tamron 17-28mm F2.8 di III RXD, although there is a small sacrifice in overall quality.  

When you’re using this Sony lens with your a7S III, you should have no trouble capturing razor sharp imagery with beautiful bokeh and corner-to-corner resolution.

Sony FE 24mm F1.4 GM 

Sony FE 24mm F1.4 GM
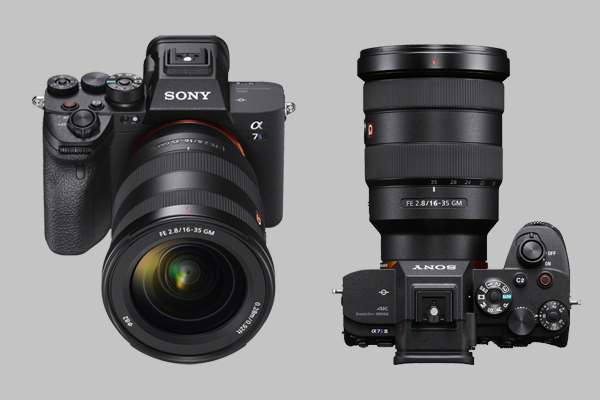
The Sony A7S III and the Sony FE 24mm F1.4 GM lens make a fine marriage. As a prime lens, the Sony 24mm is small and light, yet highly capable. 

The lens is particularly well suited to landscape photography. Like the Sony 16-35mm above, the 24mm has 2 XA elements in its construction that reduce distortion, as well as 3 ED elements for suppressing chromatic aberration. The 1.4 aperture means the lens works great in low-light, while the 11-blade diaphragm produces smooth, pleasing bokeh. 

The lens has a great autofocus performance, and like the 16-35mm, has an AF/MF switch and a programmable hold focus button on the side. Unlike the 16-35mm, the Sony 24mm has an aperture ring, a nice touch if you like to adjust F-stop using the lens. A click switch enables you to decide if you want the ring to move smoothly, or if you want to feel each rotation.  

The Sigma 24mm F1.4 DG HSM is a cheaper alternative. However, it’s also considerably heavier, with an arguably less impressive performance and build. The compact Sony 24mm F1.4 is a powerful lens, and an excellent partner to the a7s III. 

Sigma 35mm F1.4 DG HSM

Sigma 35mm F1.4 DG HSMThe Sigma 35mm F1.4 DG HSM is a popular lens, and for good reason. Firstly, the 35mm focal length means it offers the best of both worlds when it comes to wide-angle versus telephoto lenses. You can use it for almost anything. It’s wide enough for landscape photography, yet tight enough that it avoids distortion.

With a wide 1.4 aperture and 9-blade diaphragm, this Sigma lens works great in low-light, and can generate some really nice bokeh. SLD and FLD glass elements in the optical construction also reduce chromatic aberration, a common issue with wide aperture lenses. Meanwhile, the lens’ hyper sonic motor system provides fast, accurate autofocus.

The build of the lens is also strong. The focus ring moves smoothly with appropriate resistance, and there’s an AF/MF switch on the side, and a distance scale on top of the lens. 

The Sigma 35mm consistently produces sharp, well-toned imagery. Given its capacity for low-light shooting and robust focal length, this is a lens that will complement your a7S III nicely.

Tamron 28-75mm F2.8 Di RXD III

Tamron 28-75mm F2.8 Di RXD IIIThe Tamron 28-75mm F2.8 Di RXD III is a high quality, great value lens. The versatile focal length means it’s a comfortable choice for a range of styles, from landscape to portrait photography. The lens consistently produces sharp, high-contrast imagery at all focal lengths, while the autofocus is fast, reliable, and quiet. It has reliable weather sealing and a lens coating that effectively minimizes ghosting and flare. 

Although the Tamron 28-75mm doesn’t feature buttons or switches, and has a less complex construction than some of its competitors, it doesn’t translate to a weaker performance.

We recently compared the Tamron 28-75mm to the Sigma 24-70mm F2.8 DG DN Art lens and found that the Tamron lens delivers an equally powerful performance to the Sigma lens, yet it’s considerably lighter and more affordable. The Tamron also holds up performance-wise when compared with the Sony FE 24-70mm F2.8 GM, a lens at a considerably higher price point. If you’re happy to buy a third-party lens, you could use the savings to purchase another lens from this list. You won’t regret choosing the Tamron 28-75mm F2.8 Di RXD III. 

Sony 24-105mm F4 G OSS

Sony 24-105mm F4 G OSSThe final lens in our list is the Sony 24-105mm F4 G OSS. The focal range of this zoom lens means it’s a comfortable option for everything from landscape to macro photography. Depending on what you’re shooting, it’s also arguably the best lens for video. It’s a great all-rounder to fill out your collection of lenses for use with the Sony a7S III. 

The look and feel of the Sony 24-105mm matches its high quality construction. The body is well-weighted, and the focus and zoom rings have nice grip and movement. The lens also has a focus hold button, AF/MF switch, and a switch for enabling the built-in image stabilization.

The built-in image stabilization is one of the lens’ best features. It allows you to shoot handheld with the a7S III and still end up with usable footage. The autofocus performance of the lens is also great – it’s quiet, fast, and accurate. 

The F4 aperture means the Sony 24-105mm is not as reliable in low-light as other lenses in the list, but that’s okay. Despite being a zoom lens, the Sony 24-105mm can deliver imagery with remarkable sharpness and contrast throughout its focal range, as well as nice bokeh.

The Sony 24-105mm is the only E-Mount lens with this focal length, so it doesn’t have many direct competitors. The closest would be the Tamron 28-75mm, which we already recommended above as another great lens to use with the a7S III.  The performance, build, and overall quality of the lens means the Sony 24-105mm is a worthwhile investment.

That concludes our list of the 5 best lenses for the Sony a7S III.  Is there another lens you like to use with your a7S III? Let us know what you’re shooting with, and why you love it, in the comments below! 

Tamron 28-75mm F2.8 vs Sigma 24-70mm F2.8 | Lens Comparison

Photographers haven’t always been spoilt for choice when it comes to mirrorless camera lenses. Thankfully, that has changed in recent years. As more mirrorless cameras have been released, lens makers have worked hard to release a diverse range of compatible lenses. Today, we’re comparing 2 such zoom lenses, the Tamron 28-75mm vs Sigma 24-70mm. 

The Tamron 28-75mm F/2.8 Di III RXD is an E-Mount lens, made for use with Sony’s full frame mirrorless cameras. The Sigma 24-70mm F/2.8 DG DN Art lens is available in both E-Mount and L-Mount

Both lenses offer a superb performance, and it’s likely you’ll be happy with either choice. However, there are enough differences between the 2 lenses that mean one may be better suited to you over the other. Below we’ve provided a breakdown of the build, performance, and price of both lenses, in addition to a side-by-side spec comparison. 

Build 

The build of each lens is the most obvious distinction between the Tamron 28-75mm vs Sigma 24-70mm. At 836g, the Sigma lens is nearly 300 grams heavier than the Tamron, as well as longer and wider. This can make all the difference when you’re holding up your camera for multiple hours on a shoot. 

The Sigma lens is bigger due to its construction. It has a metallic body, with more glass elements inside the lens and an 11-blade diaphragm versus the Tamron’s 9-blades. As a bigger lens it also requires a larger filter size, 82mm to the Sigma’s 67mm

Both lenses have a zoom and focus ring, albeit in opposite positions. The Tamron focus ring is at the back, on the Sigma it’s at the front.  While it is heavier, the Sigma lens feels more delicately constructed. Ring movements are smoother and more precise. 

The Sigma lens also has a few additional buttons and switches you won’t find on the Tamron. There’s a switch for toggling between autofocus and manual focus, a programmable AFL button, and a zoom lock switch that allows you to lock the lens at the 24mm focal length.  The slightly wider focal length is also a plus, although that can be easily adjusted for when shooting with the Tamron lens. 

Both lenses have moisture-resistant weather sealing, proprietary lens coating, and are generally well-built. While the Tamron lens may be more portable, the additional functionality, delicate construction, and slightly wider focal length of the Sigma lens means that overall it has the better build.

Tamron 28-75mm vs Sigma 24-70mm | Lens Comparison

Performance

Considering the Sigma lens has a more intricate build, you may expect a more notable difference in performance when comparing it to the Tamron. However, both lenses are capable of delivering sharp, beautiful imagery of near-identical quality. 

Both the Tamron and the Sigma offer reliable autofocus for photography and video, working well with the Eye AF found on Sony’s full-frame mirrorless cameras. The Sigma’s autofocus can be a little slower than the Tamron lens at times, but it can also be more consistent. Additionally, the Sigma’s AFL button on the side of the lens can be assigned to the autofocus for quick activation. 

The Sigma’s 11-blade diaphragm also helps it produce slightly sharper imagery, along with nicer bokeh. However, the difference is nominal. You likely won’t notice unless you’re zooming in on your photos to examine them on a micro level, a practice commonly known as pixel peeping. 

Price

The Tamron 28-75mm is a great value lens. It’s lighter, offers a comparable optical performance, and at $879 (including 6-year limited warranty) is more affordable. The Sigma lens is currently available for $1,099, but this price difference isn’t surprising. For just over $200 more, the Sigma lens is wider, offers additional buttons and switches, and has a more sophisticated build.

Both lenses are also significantly more affordable than another competitor, the Sony FE 24-79mm F/2.8 GM lens.  

While both the Sigma and Tamron lenses are appropriately priced, if you’re on a budget, the Tamron 28-75mm is the better choice.

Spec Comparison 

Check out the table below for a side-by-side comparison of the Tamron 28-75mm vs Sigma 24-70mm lenses. 

Tamron 28-75mm F/2.8 Di III RXDSigma 24-70mm F/2.8 DG DN | A
Focal Length28-75mm24-70mm
MountE-MountAvailable in E-Mount and L-Mount
Aperture RangeF/2.8-22F/2.8-22
Diaphragm Blades911
Angle of View75 - 32 Degrees84.1 - 34.3 Degrees
Construction15 Elements in 12 Groups19 Elements in 15 Groups
Maximum Magnification Ratio (Wide)1:2.91:2.9
Maximum Magnification Ratio (Tele)1:41:4.5
AF/MF SwitchNoYes
Zoom Lock SwitchNoYes
AFL ButtonNoYes
In-Lens Image StabilizationNoNo
Filter Size67mm82mm
Diameter2.9 Inches (73mm)3.5 Inches (88.9mm)
Length4.6 Inches (117.8mm)4.8 Inches (121.9mm)
Weight19.4 oz (550g)29.5 oz (836g)

Summary 

Choosing between the Tamron 28-75mm vs Sigma 24-70mm may be tough, but there are clear distinctions between the lenses that should guide your choice. 

The Tamron 28-75mm F/2.8 Di III RXD is lightweight, affordable, and performs comparably to its pricier rival. The Sigma 24-70mm F/2.8 DG DN Art may be more expensive, but this is justified by a nicer build, additional functionalities, and a wider focal length. In other words, you can’t go wrong with either lens. 

Focusrite Interface Comparison | Scarlett 3rd Gen

If you’re looking to invest in an audio interface, it’s hard to look past Focusrite’s popular Scarlett range. By their own account, the Scarlett range has helped produce more records than any other range of interfaces in history. However, with six different models in the range, we thought it prudent to do a Focusrite interface comparison to help you determine which one is right for you.

The 3rd generation Scarlett range offers an impressive suite of features throughout all its interfaces. In ascending order of price, the 3rd gen Scarlett interfaces are the Solo, 2i2, 4i4, 8i6, 18i8, and the 18i20.

Below we’ve taken a deeper look at each interface to help determine what differentiates each one. Scroll to the bottom for a side-by-side spec comparison of all 6 interfaces.

What’s an Audio Interface?

When we compared the 2nd and 3rd generations of the Scarlett range, we defined an audio interface as a technologically advanced adapter. When you’re recording sound, the interface is the middle man between the sound source (for example, your guitar) and your DAW. DAW stands for digital audio workstation, and refers to the sound editing software you use on your computer.

Sound can be recorded as an analog or a digital signal. An audio interface converts analog signals into digital signals so your DAW can receive it. The Scarlett range of interfaces use a USB-C cable to connect to your DAW.

Focusrite Scarlett 3rd Generation Comparison

Audio Quality

Audio quality is consistent throughout the Scarlett range. All interfaces are fitted with the same, high-quality converters that can route up to 24-bit/192 kHz audio to your DAW. Every interface also offers Air mode on at least 1 input. Air mode offers a high frequency boost that can enhance the quality of acoustic and vocal recordings.

Additionally, all instrument inputs across the range have a high headroom that helps avoid distortion or clipping. Each interface also features balanced, hum-free TRS outputs on the back panel that help protect from interference when connecting to a monitor or speakers.

Inputs & Outputs

It seems the key differentiator between all Scarlett interfaces is the number of inputs and outputs. Therefore, this should be your main consideration when deciding which Scarlett interface is right for you.

The Scarlett Solo, their smallest, most affordable interface, is the most unique in this regard. It has a single 3-pin XLR microphone preamp and one ¼-inch instrument or line level input on the front panel of the interface. All other Scarlett interfaces have 2 combo microphone/instrument/line level XLR inputs. The 18i8 and 18i20 also have additional combo microphone/line XLR inputs, as well as optical ADAT and S/PDIF inputs and outputs for connecting additional channels to the interface.

As the name indicates, the Solo interface is best suited to a vocalist or musician who only ever plans to record a single input. While you can technically record both inputs simultaneously on the Solo, they are summed in mono to your DAW. Stereo recording is not possible. The 2i2, Scarlett’s most popular interface, is only slightly more expensive than the Solo. It’s a great option for any artist looking to record 2 inputs simultaneously into a stereo track.

Moving up the range from the 2i2, the name of each interface indicates how many inputs and outputs it can simultaneously record. Further proof that this is how Focusrite intends for you to determine which interface you should purchase.

MIDI I/O

If you plan to connect your interface to a MIDI keyboard or sound module, you’ll need a Scarlett 4i4 or higher. The Solo and the 2i2 interfaces do not have a MIDI input/output.

Build

The Scarlett interfaces all have a consistent look and feel, excluding the 18i20.

While the other interfaces have Scarlett’s recognizable red finish on the top, bottom, and side panels, the 18i20 is black all over. Offering a whopping 18 inputs and 20 outputs, it’s twice as wide and heavy as the 18i8. It’s also the only Scarlett interface with a talkback microphone, allowing you to speak to the artists using the interface through their headphones. Fitted with a set of rack-mounting ears, the 18i20 is a studio-grade interface.

Aside from the 18i20, there is a small, incremental increase in size and weight per interface from the Solo to the 18i8. This is to be expected considering the increase in inputs and outputs as you go up the range. 

Power

The first 3 interfaces in the Scarlett range are bus powered, i.e. powered by the USB-C cable that’s used to connect to your computer. The 8i6, 18i8, and the 18i20 all require a separate power supply (they come with a power cable). This shouldn’t be a dealbreaker, but is certainly worth considering before you decide on an interface.

Included Software

All interfaces in the Scarlett range come with two DAWs: Ableton Live Lite and Pro Tools. You also receive a free 3-month subscription to Splice.

The Focusrite software, Focusrite Control, is also included with each Scarlett interface, although it is primarily required for use with the larger Scarlett models (4i4 and up). You can use the Solo or 2i2 interfaces without having to run Focusrite Control on your computer. However, these interfaces will still require the software for firmware updates or to utilize their full functionality at sample rates higher than 48 kHz.

Spec Comparison

To complete our Focusrite interface comparison, we have added the key specs for each interface to the table below.

Solo2i24i48i618i818i20
ConnectivityUSB 2.0 Type-CUSB 2.0 Type-CUSB 2.0 Type-CUSB 2.0 Type-CUSB 2.0 Type-CUSB 2.0 Type-C
Simultaneous I/O2 x 22 x 24 x 48 x 618 x 818 x 20
Microphone Preamps122248
Instrument Inputs122222
Line Inputs124688
MIDI I/ONoNoYesYesYesYes
Optical ADAT Input000012
Optical ADAT Output000002
Analogue Outputs2244410
Headphone Outputs111222
Bus PoweredYesYesYesNo (Power Cable Included)No (Power Cable Included)No (Power Cable Included)
A/D Resolution24-bit/192 kHz24-bit/192 kHz24-bit/192 kHz24-bit/192 kHz24-bit/192 kHz24-bit/192 kHz
Dimensions (H x W x D)1.71 x 5.65 x 3.77 inches1.32 x 2.09 x 7.681.87 x 7.28 x 4.721.87 x 8.27 x 5.892.40 x 9.49 x 6.281.83 x 19.0 x 10.23
Weight (without accessories)0.77 lb1.10 lb1.42 lb2.36 lb3.45 lb7.85 lb

Focusrite Interface Comparison – Summary

When comparing the 3rd Generation Scarlett audio interfaces, you have to appreciate the consistency of the range. All six interfaces offer a sleek build, high headroom instrument inputs, Air mode, and powerful 24-bit/192kHz AD-DA converters.

The consistent quality means that Focusrite has an interface that will satisfy any artist, without forcing them to pay for features they don’t need. It’s a bold vision they’ve successfully executed with every interface, from the simple Solo to the powerful 18i20. Each offers a reliable, professional-grade performance. Depending on your I/O demand, there’s a Scarlett interface that’s right for you.

Sigma 105mm F/2.8 DG DN Art Lens Review | Sigma’s First Mirrorless Macro

This morning Sigma announced a new 105mm F/2.8 DG DN Art lens, their first full-frame macro lens exclusively for mirrorless cameras. The lens is available in E-mount or L-mount, and promises to be another great addition to Sigma’s Art line.

The lens offers an impressive macro performance, and with a 105mm focal length and wide F/2.8 aperture, it is also highly capable of portrait photography. We put the lens to the test by pairing it with a Sony a7 III and taking it for a spin in a local park. Here’s our Sigma 105mm F/2.8 DG DN Art lens review. 

Macro photography is all about detail, and in order to capture detail, you need a powerful lens. The Sigma 105mm F/2.8 DG DN is a powerful lens, encased in a durable, weather-sealed metallic shell. The lens has a look and feel that matches its potency. 

Built with a new optical design, this lens can produce exceptional, edge-to-edge sharp imagery. A switch on the side of the lens allows you to toggle between 3 different focal zones. This allows you to more easily find the right focus, depending on if you’re shooting close-up, portrait, or require the full focal range.  

Additionally, the lens’ 9-blade rounded aperture enables it to produce deep, pleasant bokeh, which can really elevate your macro and close-up photography. 

Photo captured using Sigma 105mm F/2.8 DG DN Macro Art Lens with Sony a7 III
Photo captured using Sigma 105mm F/2.8 DG DN Macro Art Lens with Sony a7 III.

Another nice feature of this lens is that it has an aperture ring. When shooting with the lens, we appreciated being able to adjust the F-stop without having to click a button on the back of the camera.  However, if you prefer to use the camera, you can rotate the ring to lock it in place and enable on-camera adjustment.

The aperture ring also has a click switch. When on, you can feel the ‘click’ each time you rotate the ring to a new third-of-a-stop. We liked using the click as it allowed for more precision when adjusting to find the right aperture. With the click switch off, the ring moves as smoothly as the focus.

Other features of the lens include a switch for shifting between auto and manual focus, as well as a programmable autofocus lock (AFL) button. When shooting portraits, this button could be well utilized with Sony’s Eye AF feature, allowing you to quickly set and lock focus to your subject while photographing them.

Photo captured using Sigma 105mm F/2.8 DG DN Macro Art Lens and Sony a7 III
Photo captured using Sigma 105mm F/2.8 DG DN Macro Art Lens and Sony a7 III.

As promised by the lens’ powerful design, all our photos were free of color bleeding, lens flares, and ghosting. The lens also automatically corrects chromatic aberration in every image, saving you the trouble of having to correct this later in your editing software.

Overall, our Sigma 105mm F/2.8 DG DN Art lens review proved that Sigma’s new macro can deliver what it promises. The optical power of the lens helped us capture some really nice macro, close-up, and portrait photos, while features like the aperture ring and focus zone limiter made shooting easier. The Sigma 105mm F/2.8 DG DN Art lens is a powerful, high-functioning macro & portrait lens.